
You can trigger unique automated follow-up emails, based on how your typeform respondent scores. Do this by creating conditional email notifications using a Zapier connector. (Remember, we offer a built-in Respondent notification feature, as well!)
Using Zapier to connect your typeform to an email application like Gmail, you can set up notifications based on your respondents’ scores. This Help Center article explains how to connect your Typeform and Gmail accounts: Send email notifications or follow-ups from new typeform entries.
The next step is to set up the Zapier connector.
I am going to use a Likert scale questionnaire as an example of how to do this:
Test it for yourself! Submit the above typeform a few times with different answers to receive different email notifications. To test the form, you’ll have to add a real email address to the email field.
A respondent with a high score mainly agrees with my statements, whereas a low score means disagreement. I’m going to have three automated messages: one for high scores, one for middling scores, and the last for low scores.
The lowest possible score with my typeform is three (3 x 1), and the highest is fifteen (3 x 5). I’m going to say that anyone scoring five or less disagrees, from six to nine points is neutral, and ten or above is positive.
This means I’ll have to set up three Zaps, covering each score range.
To set up the first Zap, I’ll start by following the steps in this article up to Step 5. After that:
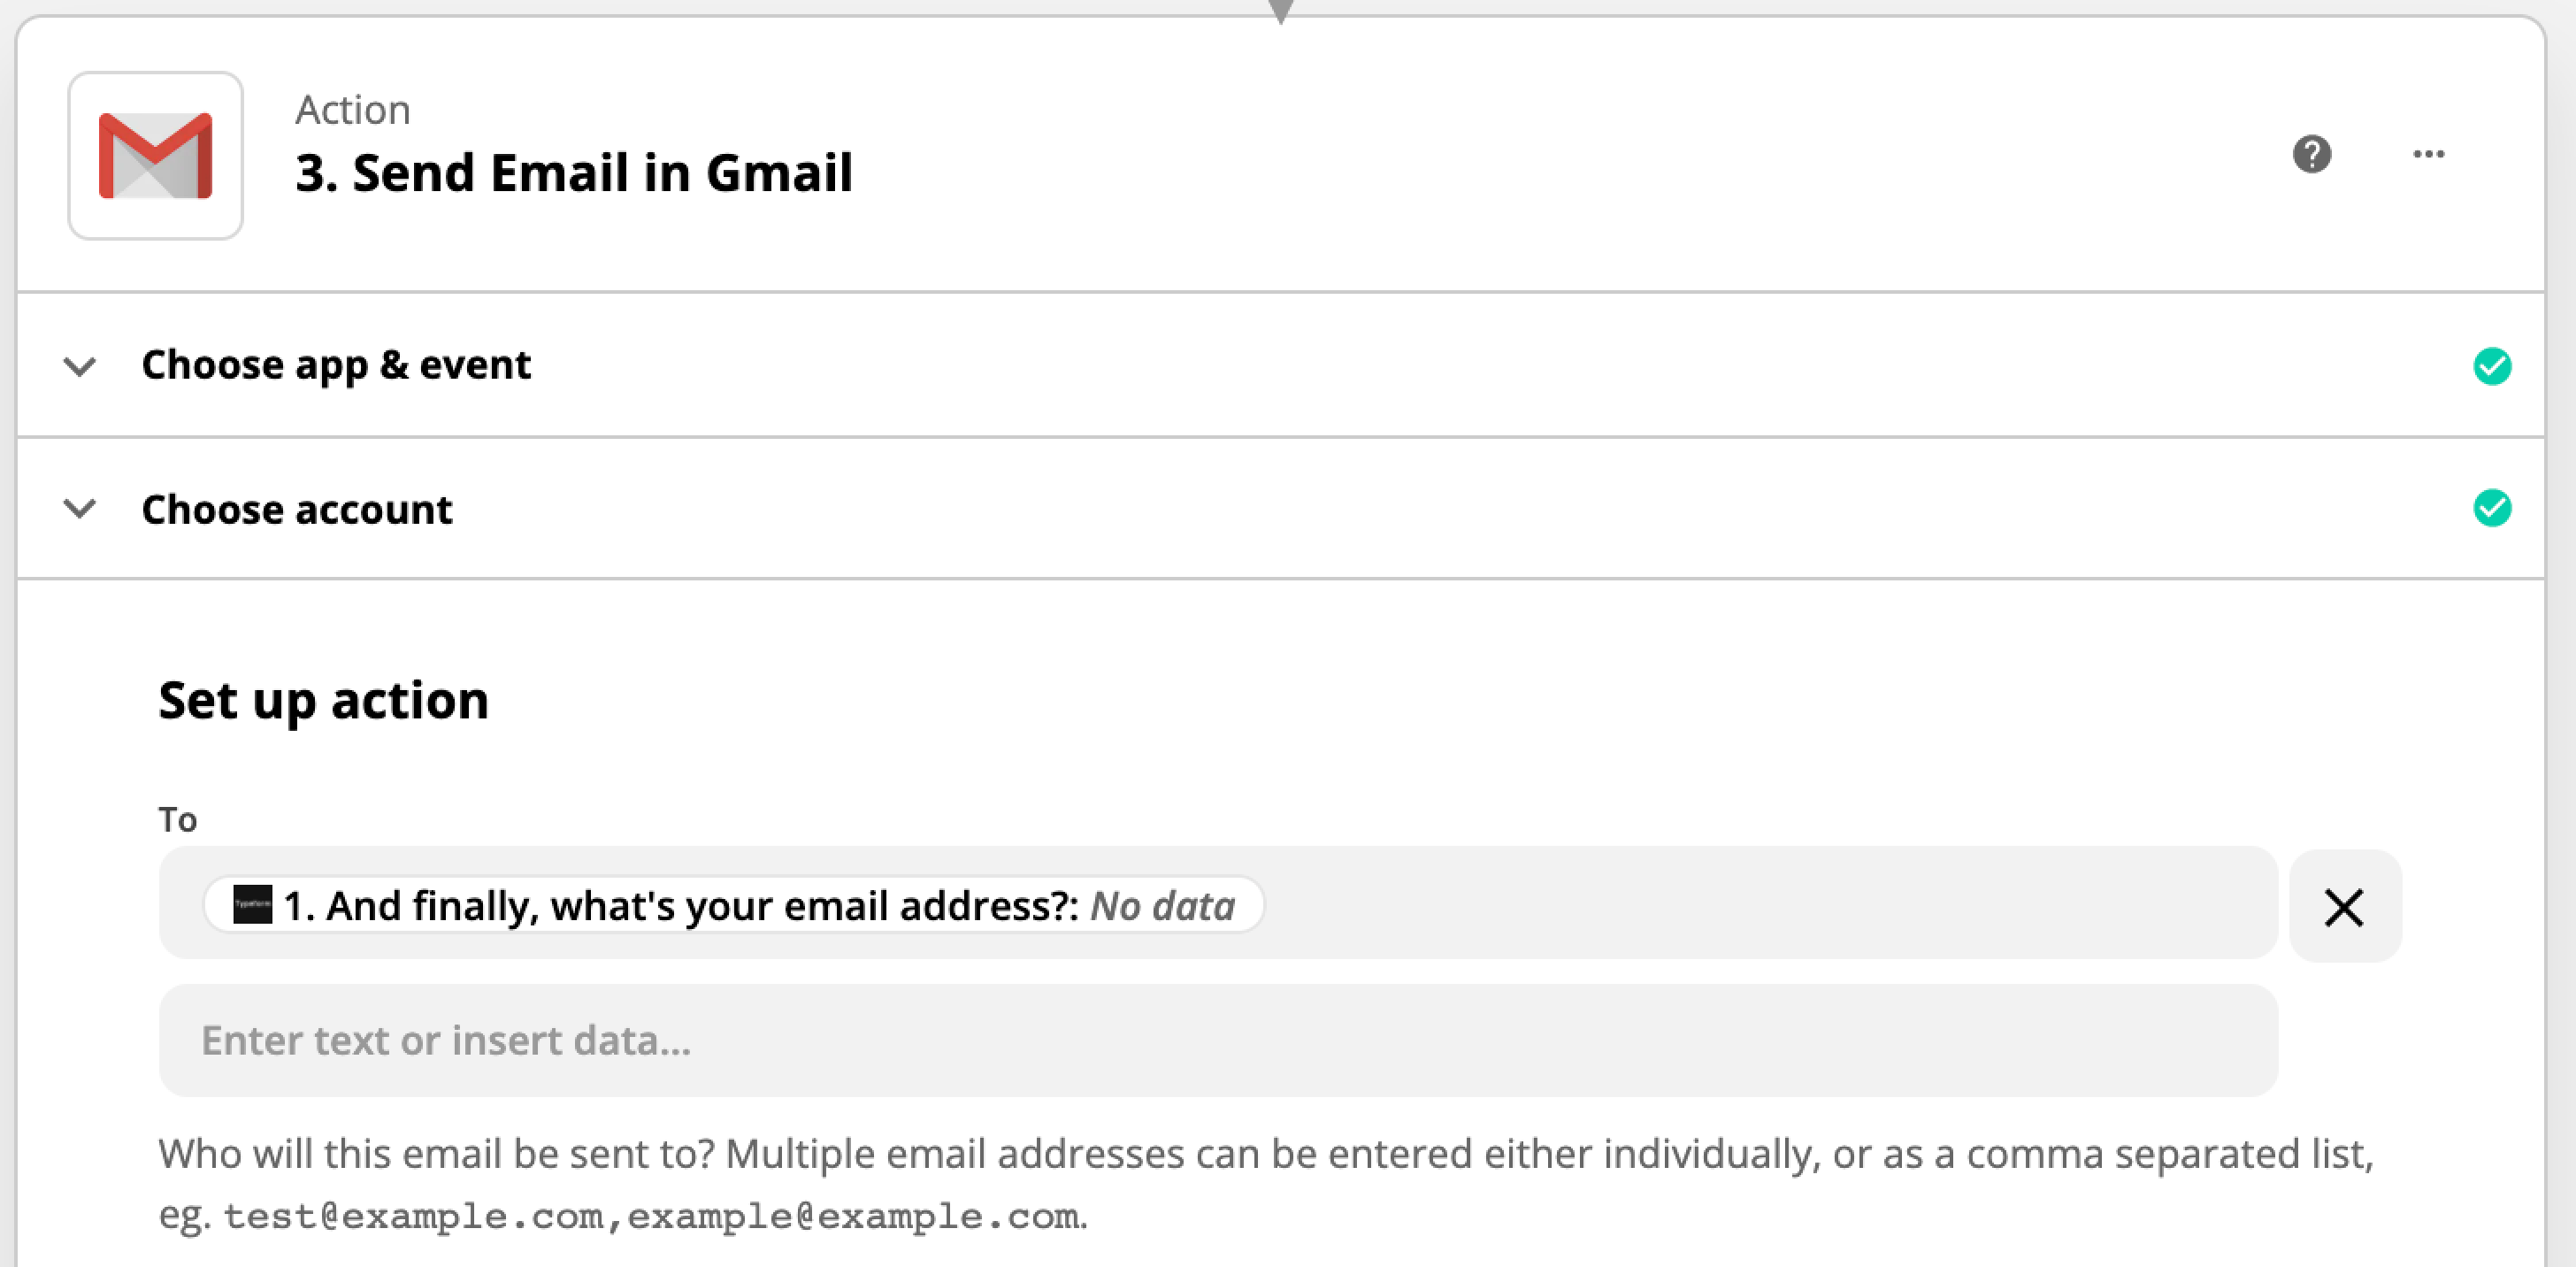
1. Using the selection icon at the end of the “To” field, I’ll select the email question from the typeform. This will ensure that the email notification will be sent to the email address given by the respondent:
2. I’ll configure the email body with the content for those who score five or less and add relevant content.
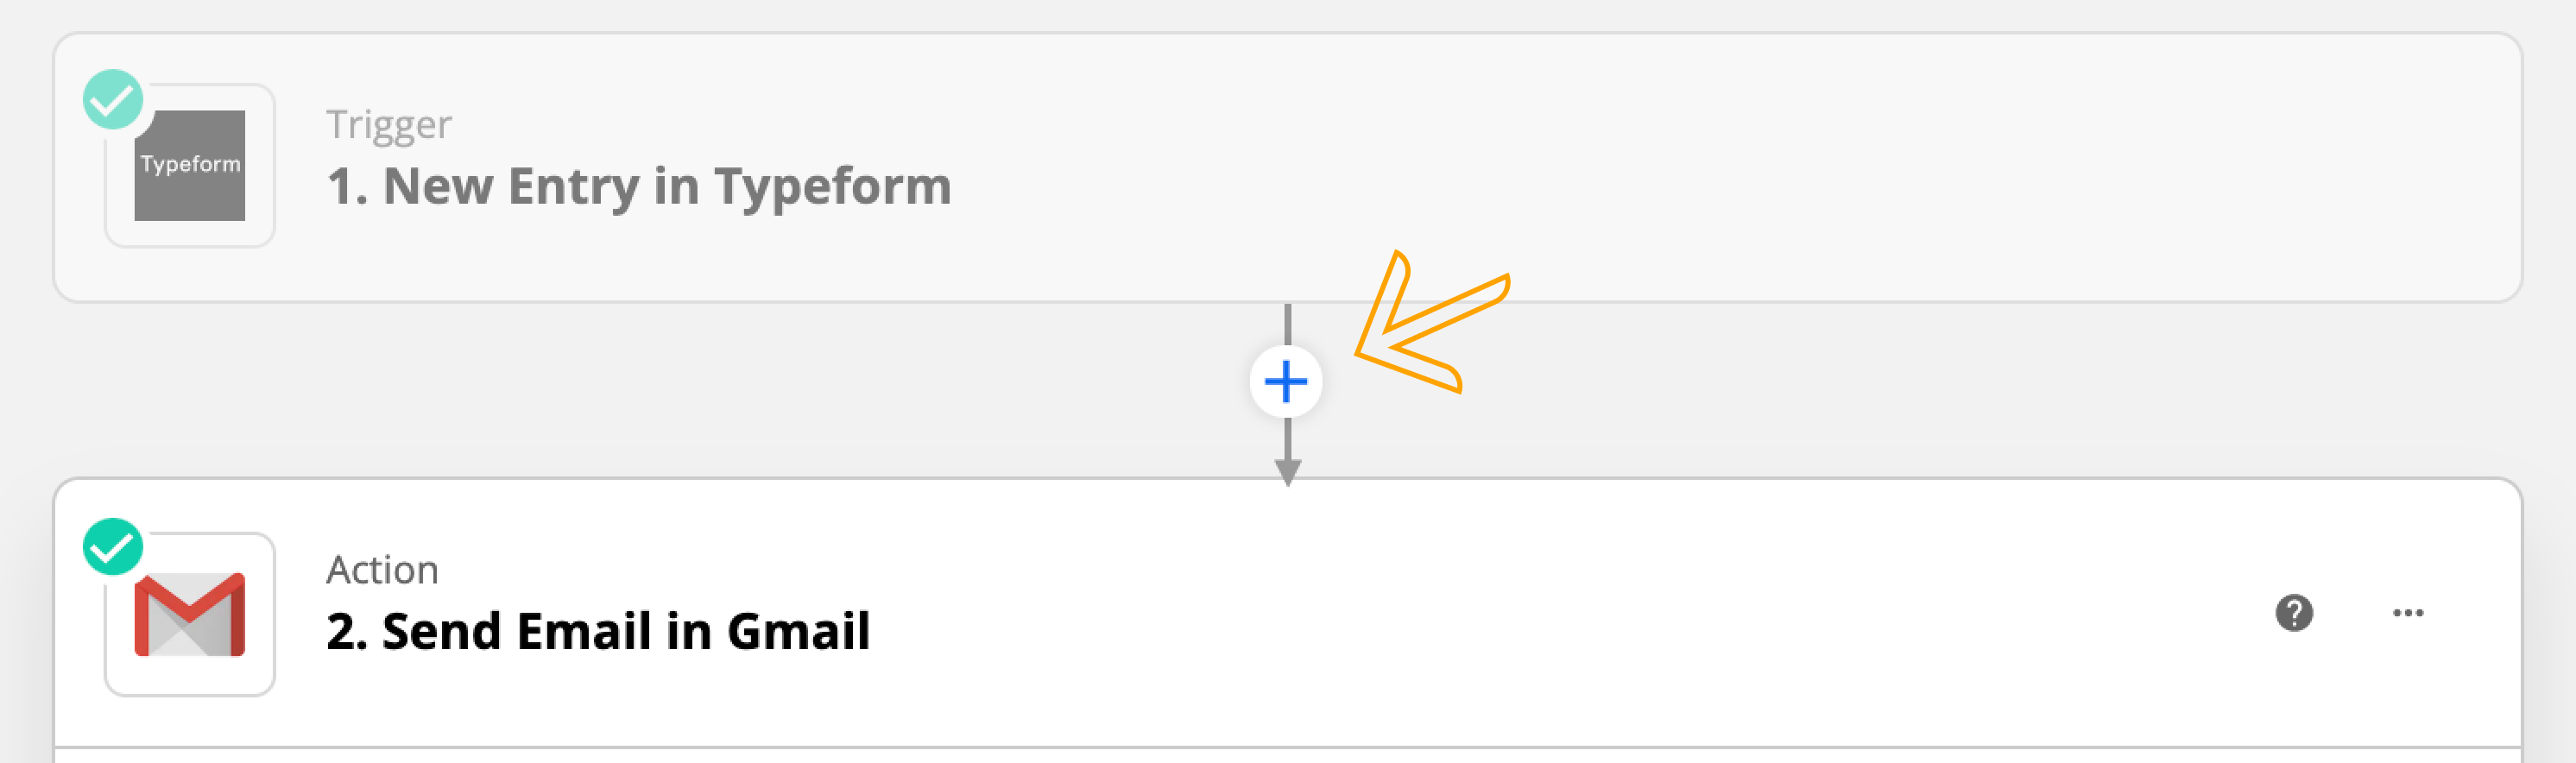
3. Once I’m done configuring the email, I’ll click on the + icon between the Trigger (New entry) and the Action (Send Email):
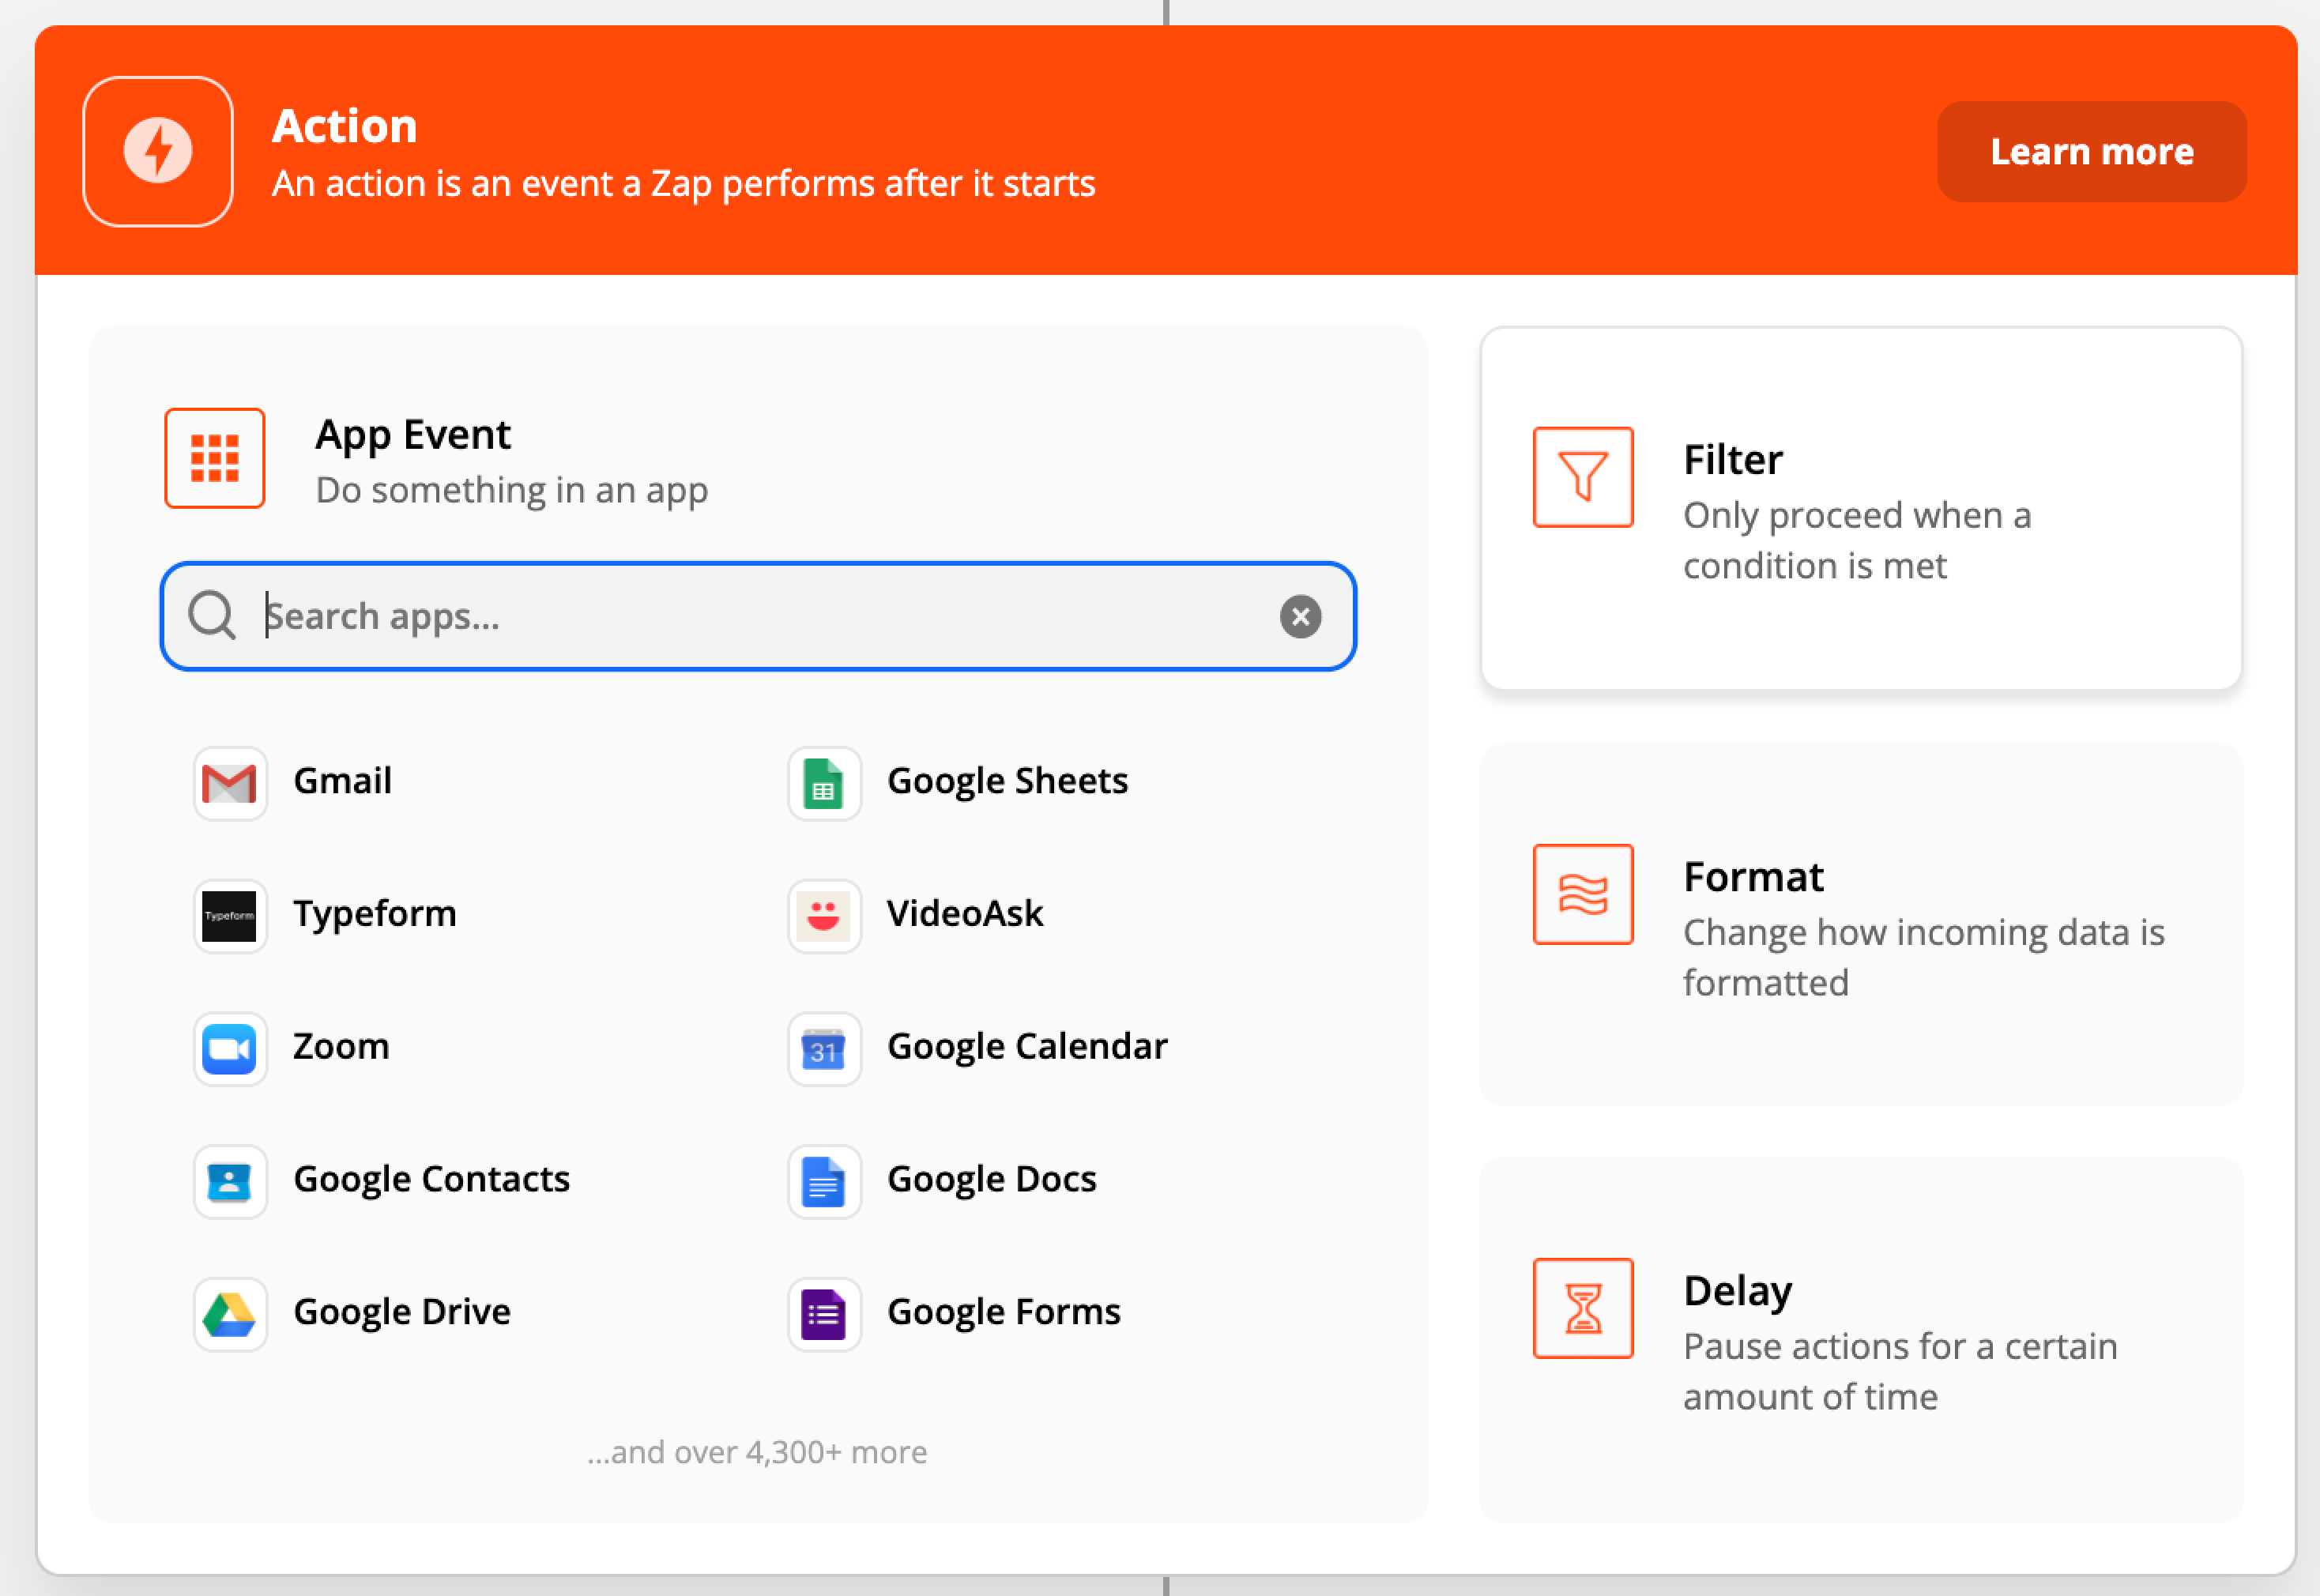
4. I choose the Filter block in the next dialog:
5. I’m now going to set up the filter by adding conditions and clicking on Continue. Using our example, we want the above configured email sent only if the score was 5 or less (= less than 6). Therefore, I’ll use the condition: (Number) Less than 6 as seen in this screenshot: 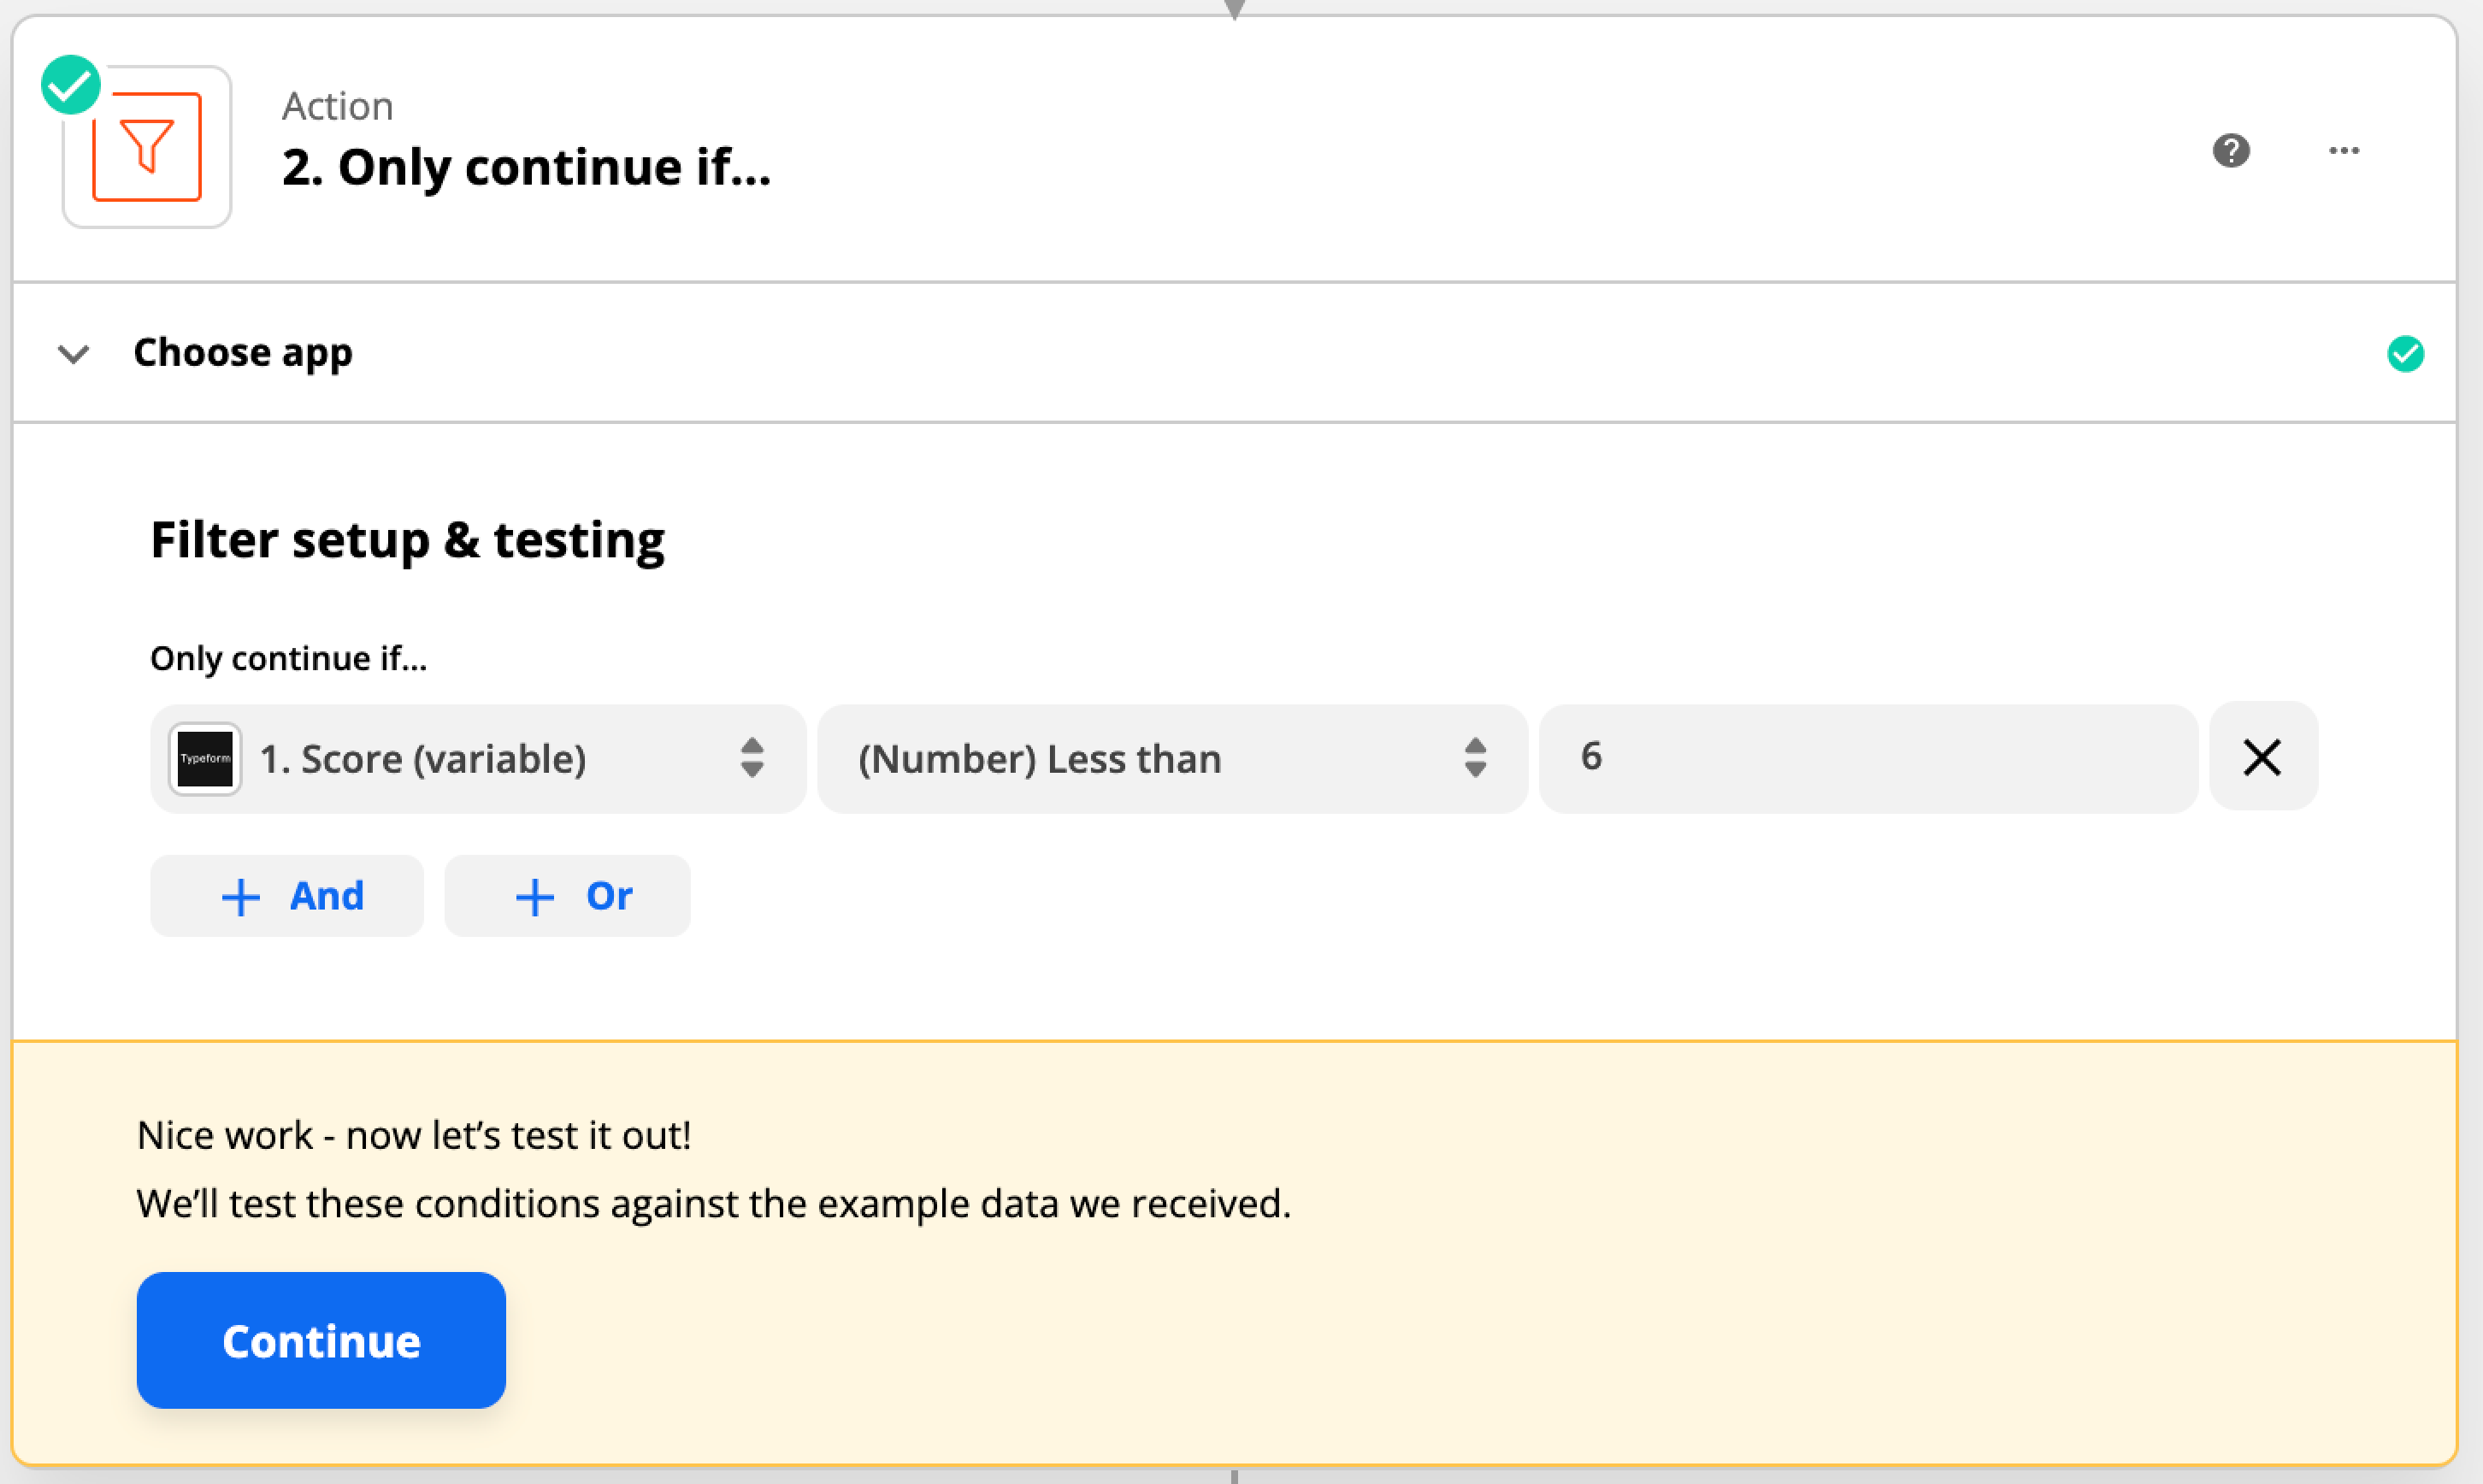 This will ensure that the Zap will only run if the condition is met.
6. Finally, I’ll make sure to turn the Zap on!
You’ll have to set up Zaps to cover each score range. Using our example, I’ll need to set up three Zaps:
1. Send email with relevant content if the score is 5 or less: as described above.
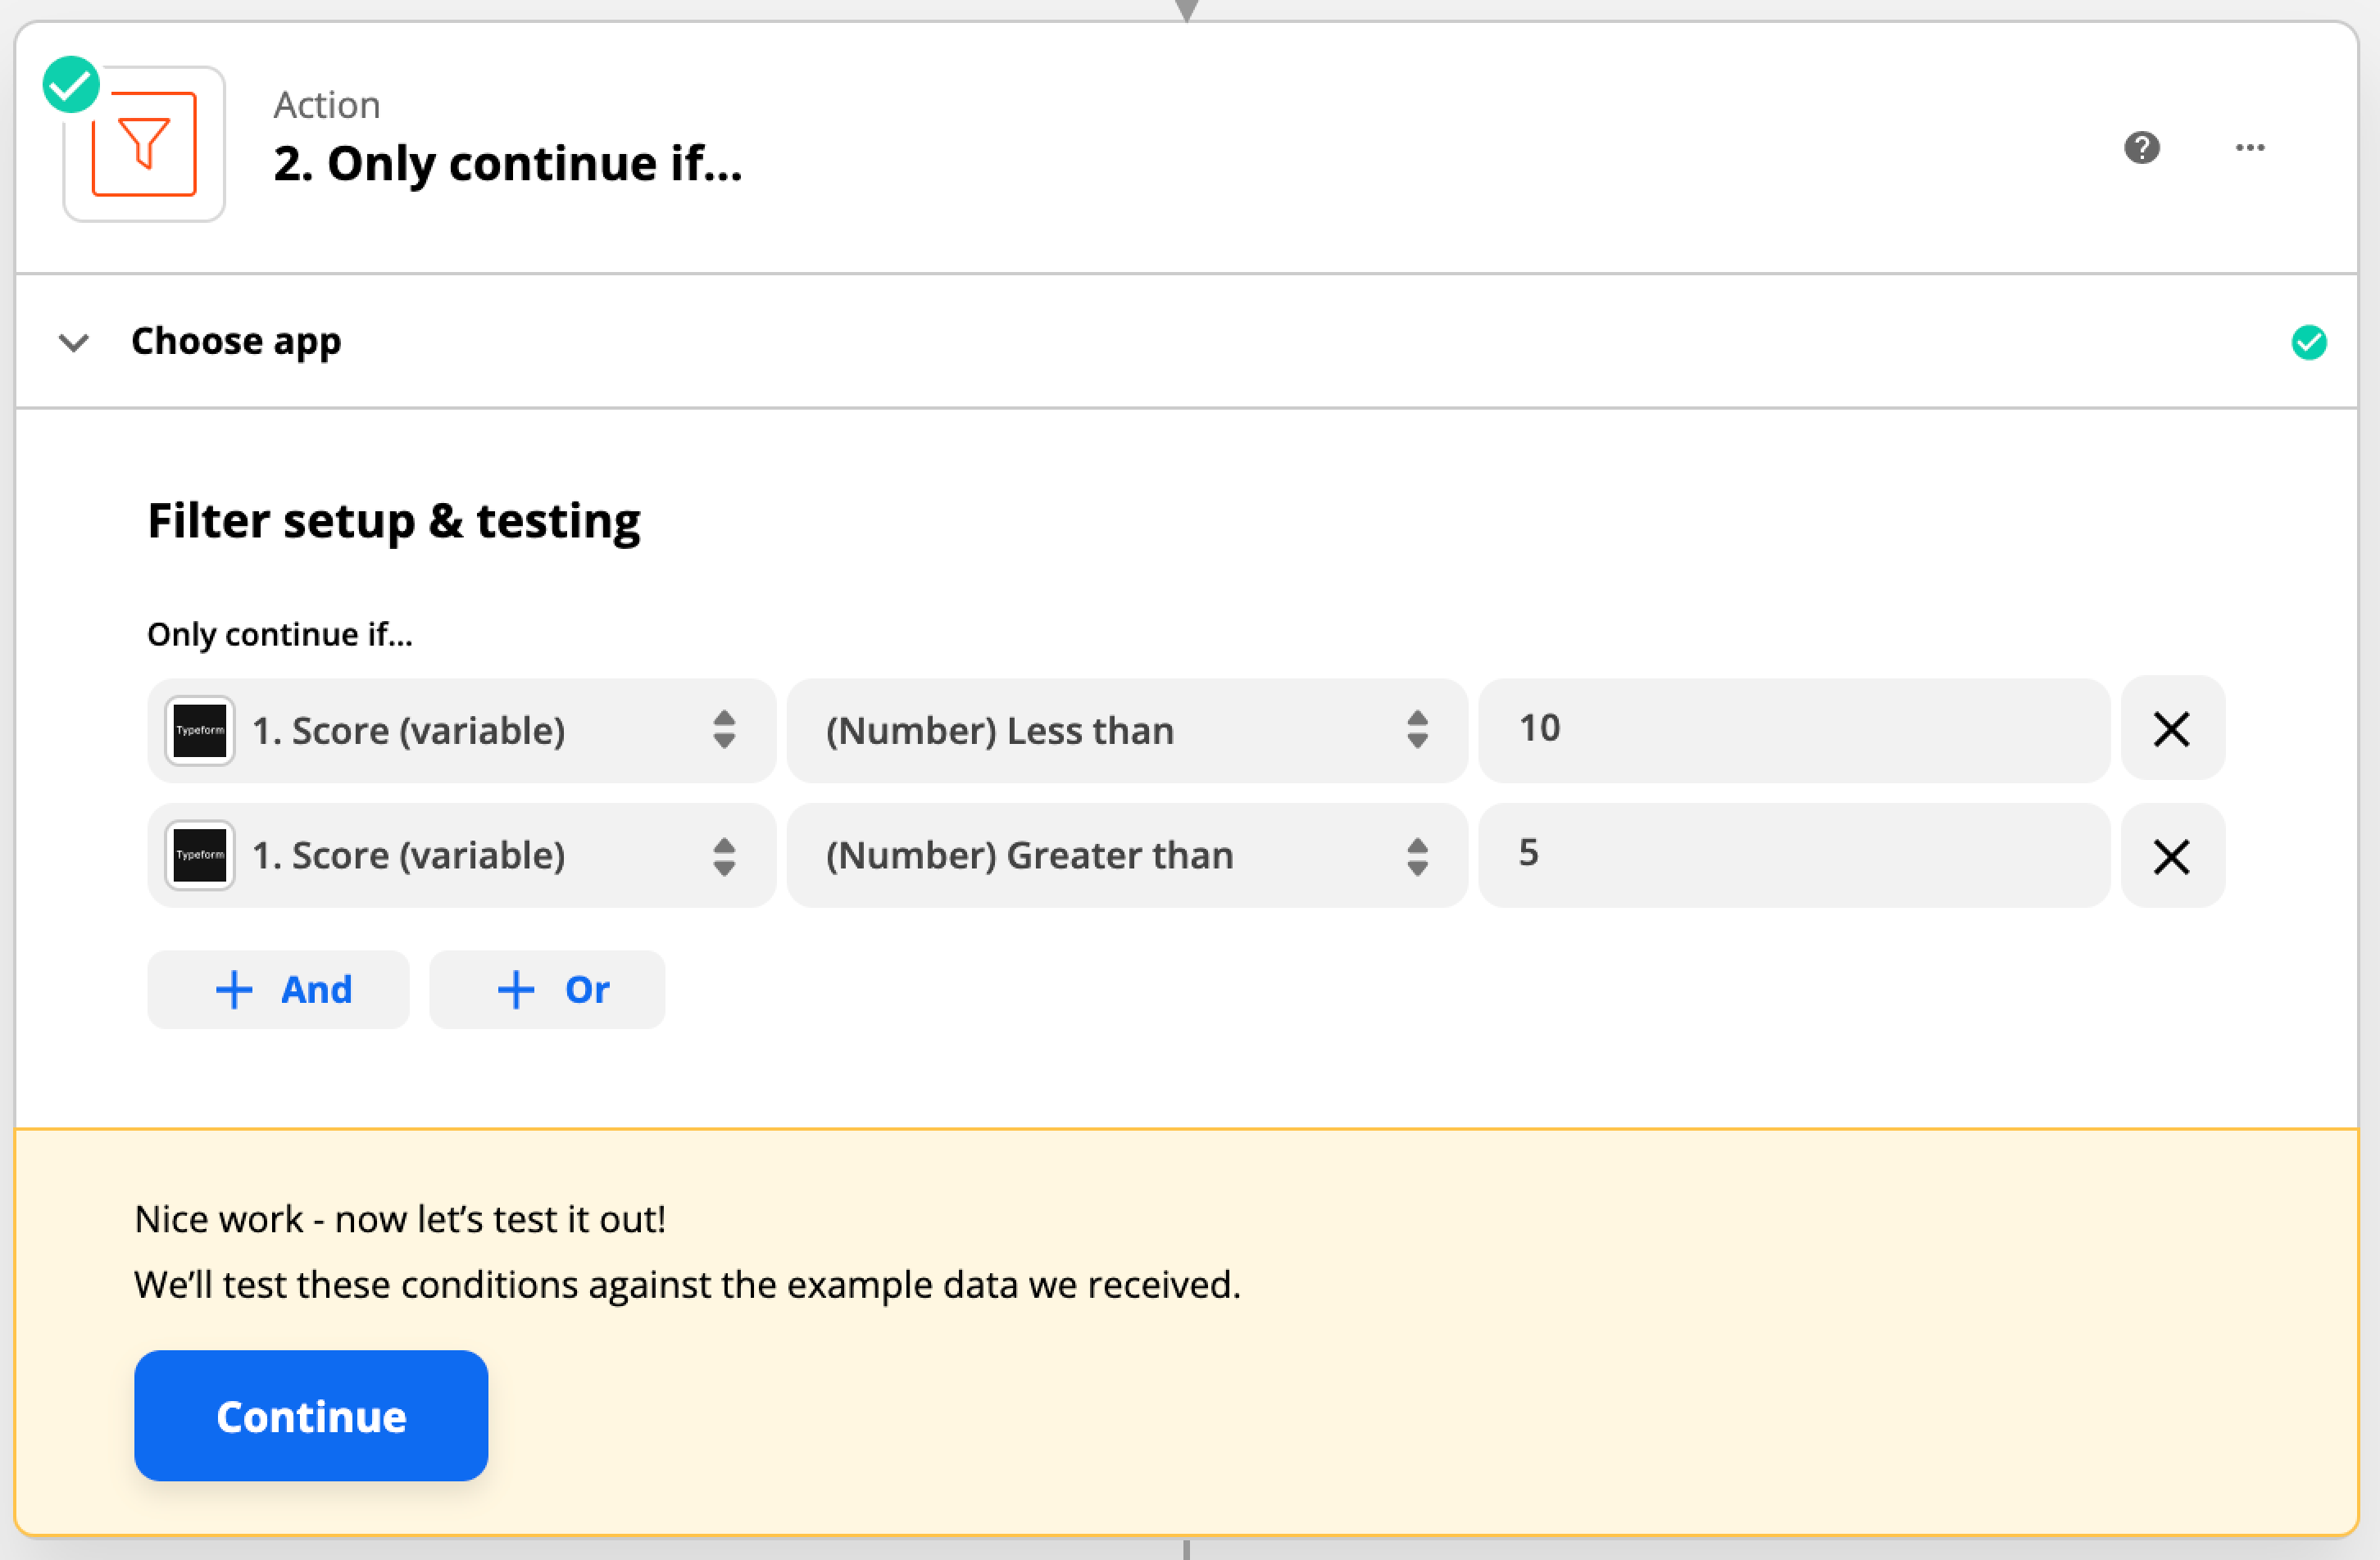
2. Send email with relevant content if the score is between 6 and 9: follow the steps described above but…
- Configure the Body of the email to match the score range (middling) under Step 2
- Select the following conditions when setting up the filter under Step 5:
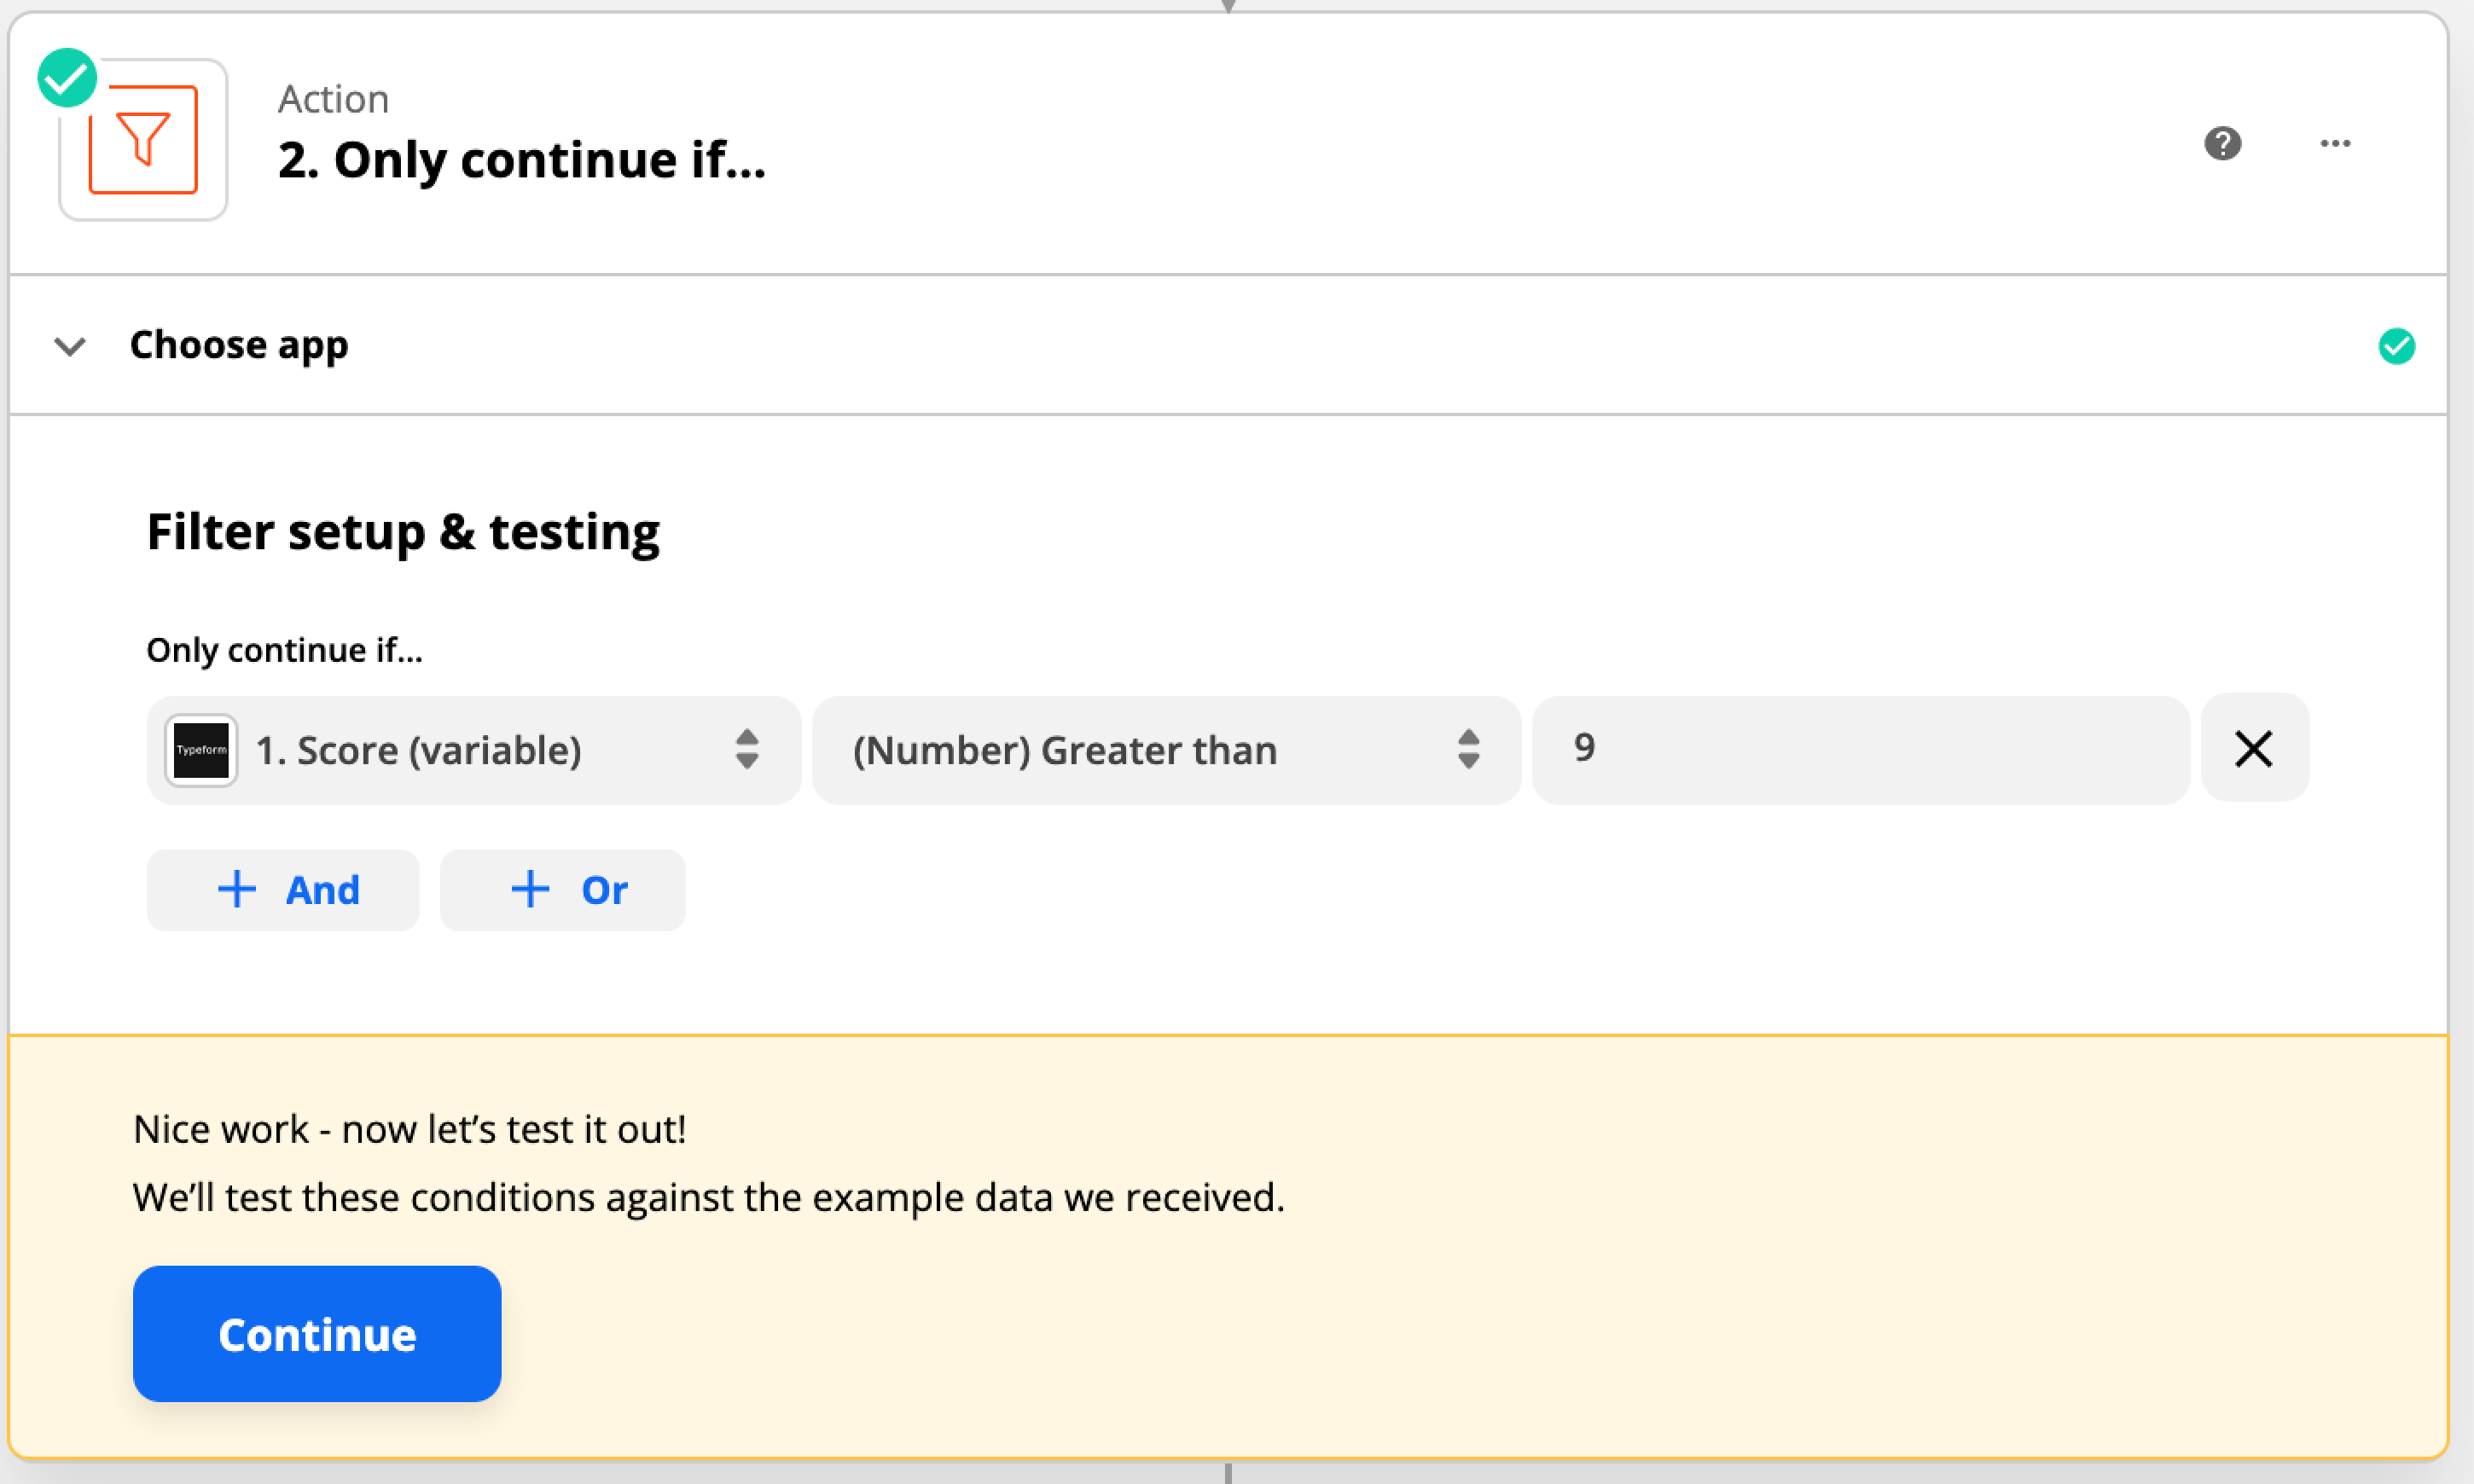
3. Send email with relevant content if the score is 10 or more (= more than 9): follow the steps described above but…
- Configure the Body of the email to match the score range (high) under Step 2
- Select the following condition when setting up the filter under Step 5:
And that’s it!
To learn how to set up notifications based on answers, check out this article.