Set up SSO authentication for your account (for Enterprise customers)
If you’re an Enterprise Typeform customer, and your company is using an identity provider, your IT department can configure a SAML or an OIDC authentication protocol for you. This will make logging into your account easier and safer.
Note that SSO is only included in the Tier 1 Enterprise plan and can be added to other Enterprise plans at an extra cost.
Once your Enterprise account is set up for SSO, the members of your organization will no longer need to enter a password to log into their account. They’ll be able to log in just by entering their email address here.
If you're having trouble logging in to Typeform through your company's SSO portal, or if you're an SSO administrator at your company and can't add members to your SSO service, please contact your Customer Success Manager at Typeform.
Technical requirements
Your single sign-on (SSO) identity provider can be Okta, OneLogin, Azure, PingFederate or other providers that support SAML, OAuth or OpenID.

Note! The LDAP authentication protocol is currently not supported.
To set up SSO authentication for your account and its members, you must:
- Have an Enterprise Typeform account with SSO enabled
- Be the Administrator of your Typeform account
- Have your unique SSO URL and Audience URI provided by Typeform
You can contact your Customer Success Manager at Typeform if you have not received this information.
Based on your Identity Provider (IDP) and the authentication protocol, you can use one of the following authentication options:
Okta SAML
To set up SAML with Okta:
1. Go to your Okta administrator dashboard to set up the SAML application. Your Okta URL should have the following format: https://{yourcompanyURL}.okta.com/admin/apps/add-app
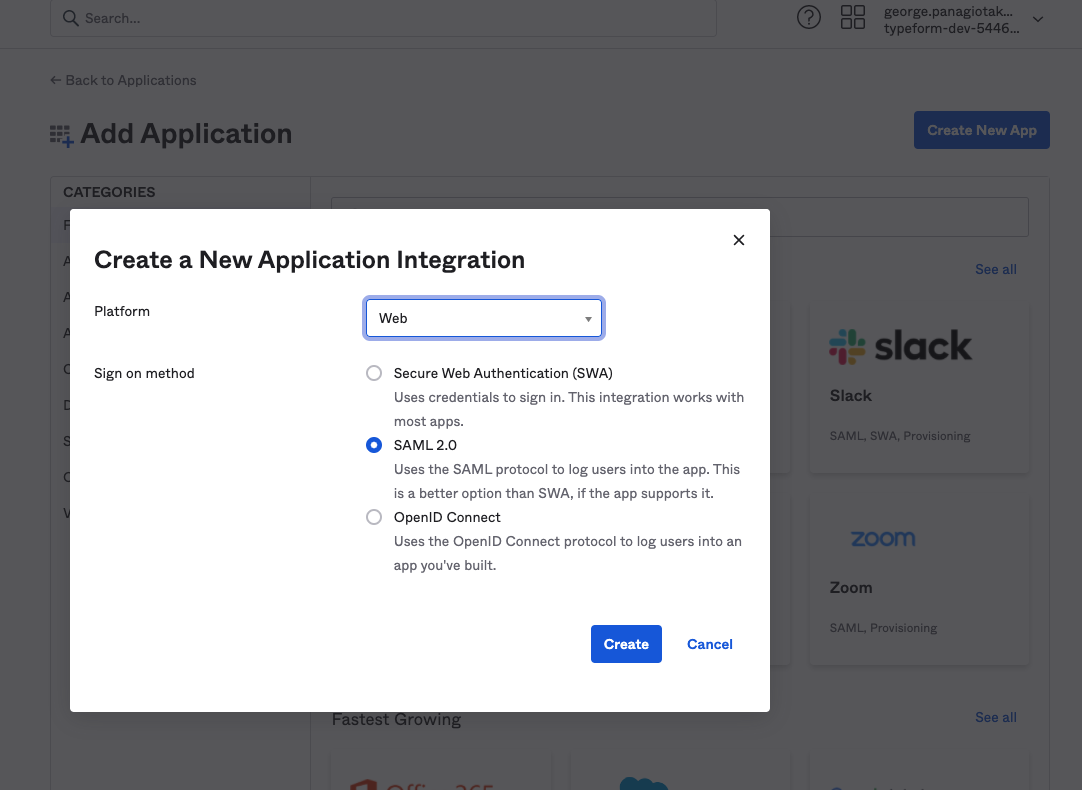
2. Click Create New App and select Web from the Platform dropdown list and click the SAML 2.0 radio button next to Sign on method, then hit Create.
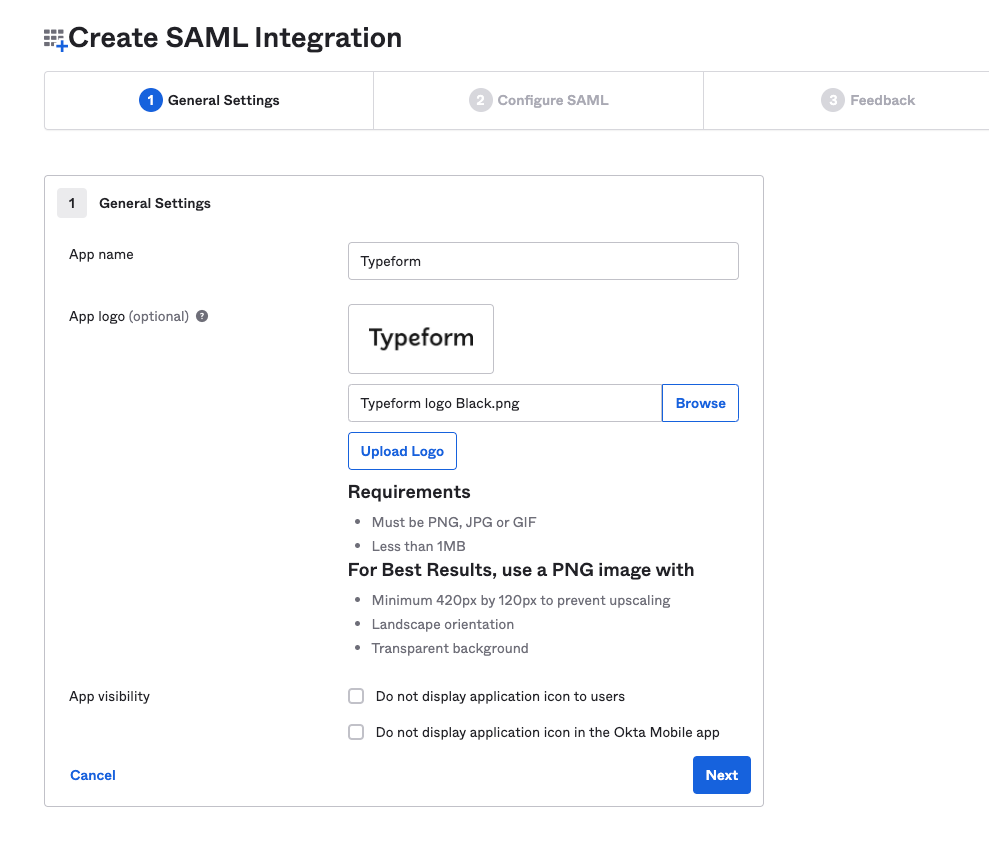
3. Enter Typeform as the App name, upload the Typeform logo, and click Next. You can find the Typeform logo here.
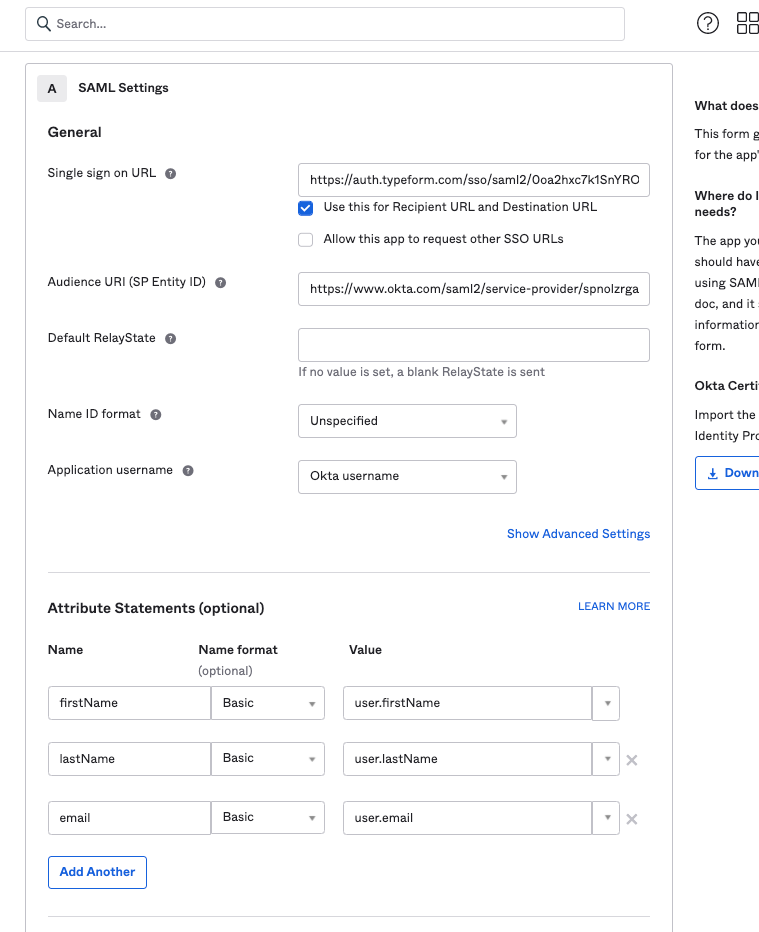
4. Enter the following values into the fields:
- Your Single sign on URL provided by your Typeform contact person
- Your Audience URI (SP Entity ID) provided by your Typeform contact person
- Your Default RelayState in the following format: https://admin.typeform.com/auth/okta/sso-redirector?domain={yourcompany-domain.com}
- Select Unspecified from the Name ID format dropdown list
- Select Okta username from the Application username dropdown list
- In the Attribute Statements section:
- Add firstName, and select Basic and user.firstName from the dropdown lists
- Add LastName, and select Basic and user.lastName from the dropdown lists
- Add email, and select Basic and user.email from the dropdown lists
5. Click Next and select the I’m an Okta customer adding an internal app option and leave everything empty, then click Finish.
6. Click View Setup Instructions and provide the following information to your Typeform representative:
- IdP Issuer URI
- IdP Single Sign-On URL
- IdP Signature Certificate
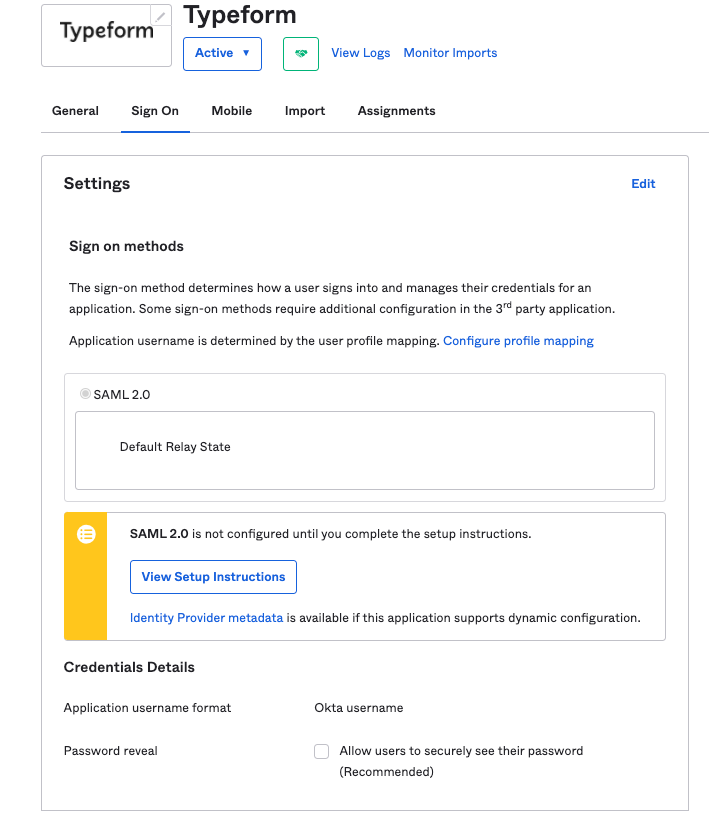
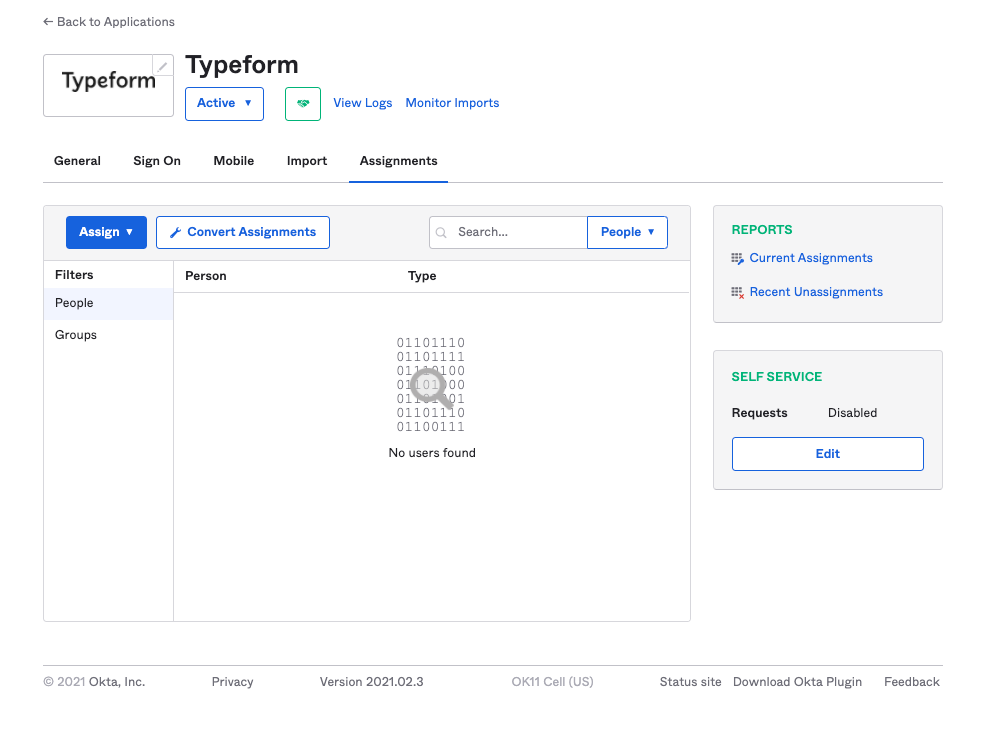
7. Go to the Assignments tab, and configure who will have access to the application in your company. Use the Assign button to create assignments for specific People and Groups.
8. Now you’ll see Typeform in the My Apps section of your Okta dashboard:
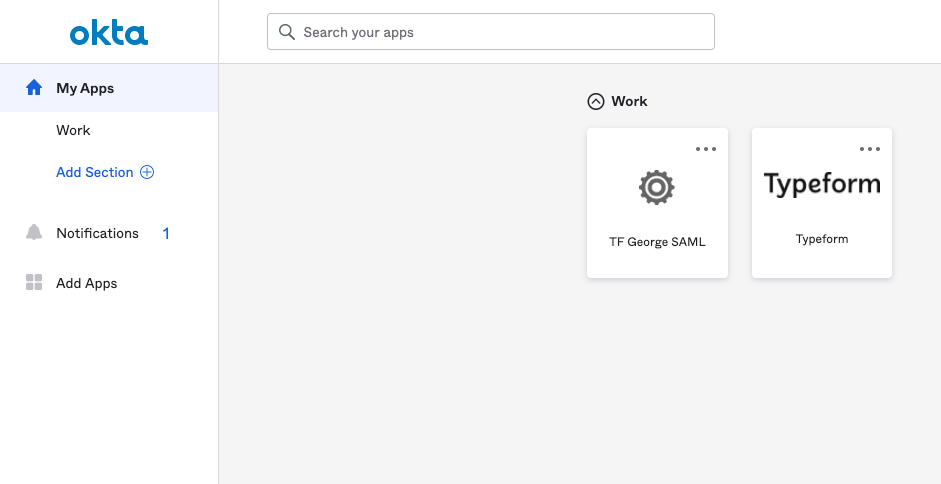

Note! You’ll only see SAML (and SWA) applications on this dashboard. To configure OIDC authentication, you’ll have to create a new custom SWA app. Read on to find out how.
9. Wait for Typeform to finish the configuration, and your Okta SAML setup is good to go.
Okta OIDC
To set up OIDC with Okta:
1. Contact your Typeform representative, who will guide you through the configuration process.
2. Go to your Okta dashboard. Your Okta dashboard URL should have the following format: https://{yourcompanyURL}.okta.com/admin/apps/add-app
3. Click Create New App and select Web from the Platform dropdown list and the OpenID Connect radio button next to Sign on method, then hit Create.
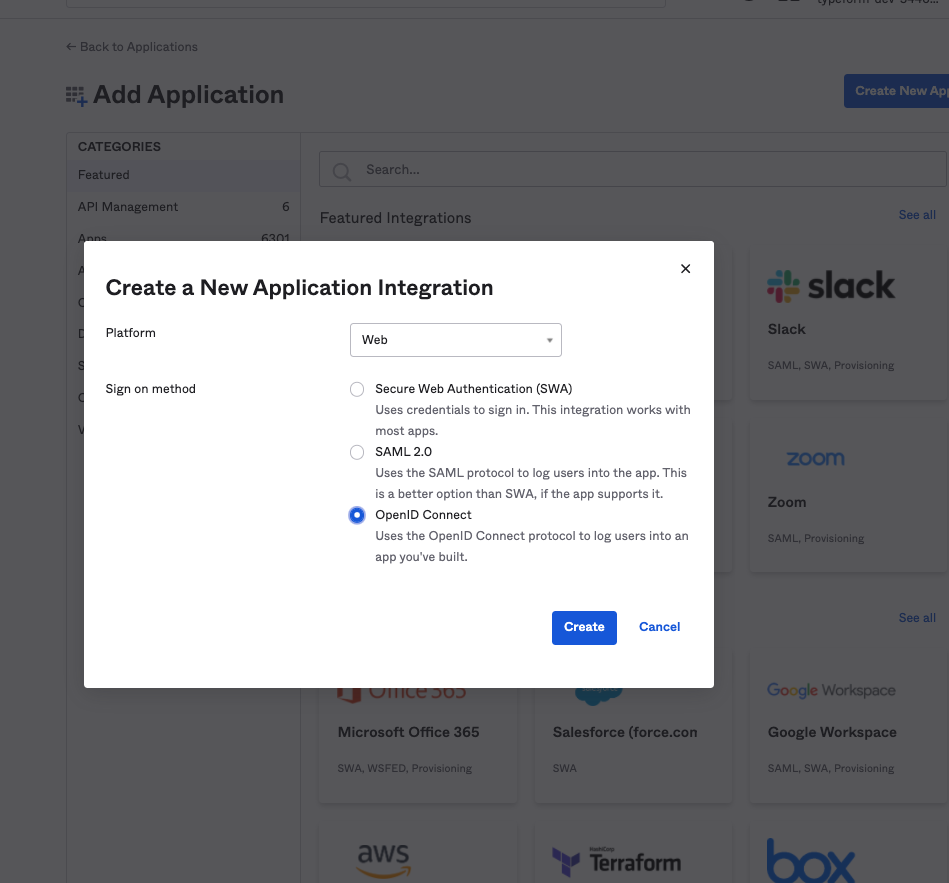
4. Enter Typeform OIDC as the Application name. Enter the following in the Login redirect URIs field https://auth.typeform.com/oauth2/v1/authorize/callback, and click Save.
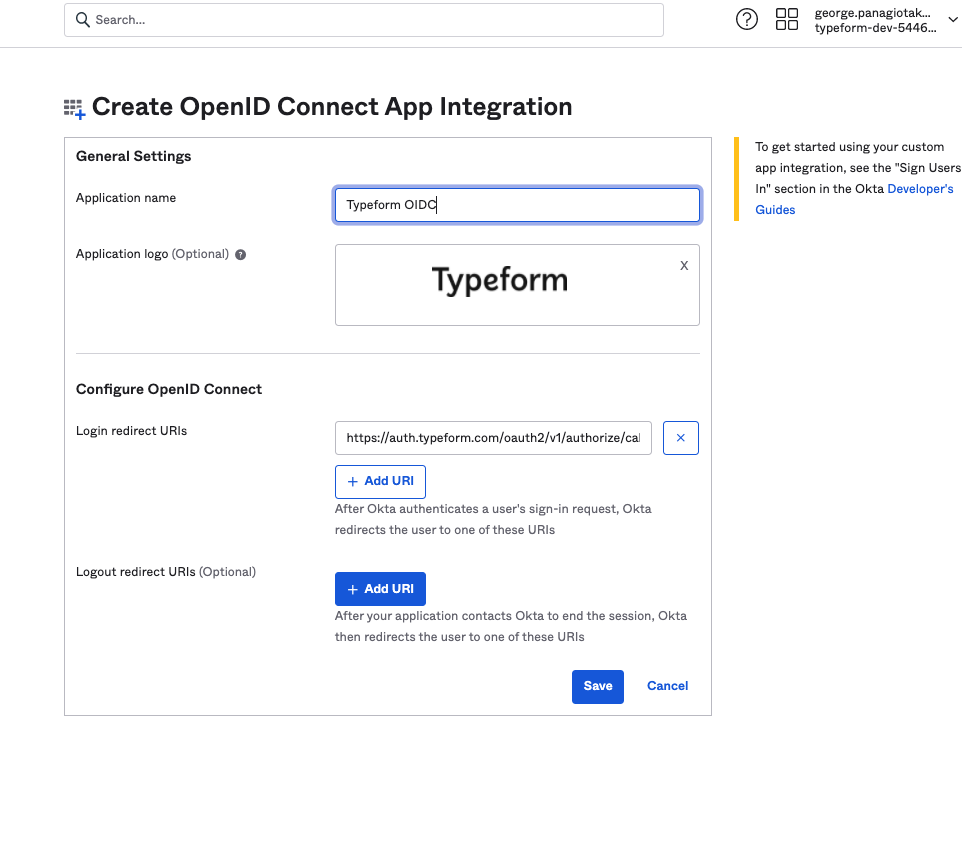
5. Click the newly created application to open it. Copy your Client ID and Client secret, and share them with the Typeform support agent helping you through the configuration process.
6. Click Edit in General Settings and click Allow ID Token with implicit grant type next to Implicit (Hybrid).
7. Go to the Assignments tab, and configure who will have access to the application in your company. Use the Assign button to create assignments for specific People and Groups.

8. Go to the URL in the following format https://{theIdPdomain}/.well-known/openid-configuration and replace {theIdPdomain} with your company domain name.
Send the following information to your Typeform representative:
- issuer: "https://tf.okta.com",
- authorization_endpoint: "https://tf.okta.com/oauth2/v1/authorize",
- token_endpoint: "https://tf.okta.com/oauth2/v1/token",
- userinfo_endpoint: "https://tf.okta.com/oauth2/v1/userinfo",
- registration_endpoint: "https://tf.okta.com/oauth2/v1/clients",
- jwks_uri: "https://tf.okta.com/oauth2/v1/keys",
9. Wait for Typeform to create the OIDC identity provider, then let them configure the app on your dashboard, and your Okta login will be good to go.

