
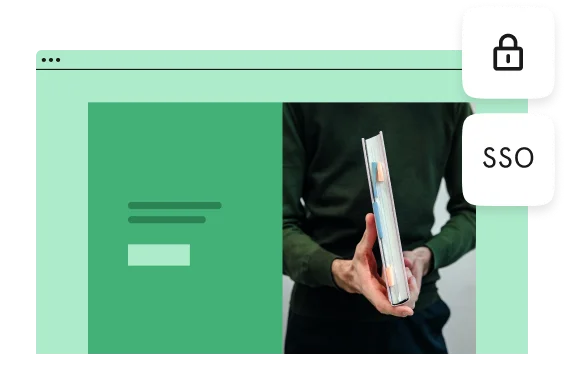


How to create professional looking event badges by merging form answers in a PDF
Running an event? You can automatically create slick event badges from your attendees’ typeform responses. Add images and QR codes to their badges – all without you lifting a finger.
This article explains how to generate an event badge by merging typeform answers in a PDF. The attendee fills in their personal details, uploads their photo, and the solution will create a badge and instantly email them a copy. You can also get the copy of the PDF file sent to yourself, or to someone on your team.
In this case we’re creating an event pass. However, you can use the same process to merge your typeform with a PDF to automatically perform a whole host of tasks. For instance, you can:
- Generate contracts and legal documents
- Send sales quotes based on a lead’s requirements
- Produce assessment reports based on a respondent’s answers
- Create personalized invitations or cards
What you’ll need
In order to make this solution you’ll need the following tools:
- A Typeform account (you’ll need a Basic plan if you want to include people’s photos in the event pass).
- Google Sheets
- Google Slides
- The Document Studio add-on for Google Sheets. It’s free for up-to 20 passes per day, if you need more it’s $29 per year
- Esponce account (optional). If you want to add QR codes to the event passes you’ll need a subscription to this service. Pricing starts at $12 per month. There’s a 14-day trial available with no credit cards details needed.
- Zapier account (optional, if you want to add QR codes)
How to create event badges with a typeform
The following guide will walk you through the process of setting up the badge generator, including:
- Building the typeform to collect the attendee’s details
- Sending responses to a PDF
- Creating a scannable QR code with the attendee’s contact details and printing it on the form (optional)
In total, all this should take just over an hour. Once it’s set up, the whole system runs automatically, so it’s probably a relatively small time investment given the hours you’ll save.
Part One: Make the typeform (takes 15 minutes)
The first stage is to create a typeform to collect the details needed to make the event pass. In this example, we’re going to print the following information onto the pass:
- Attendee’s name
- Their company name
- Job title
- Email address (which we’ll embed in a QR code)
- Photo of the attendee
In this scenario we’re making a form that will be sent to an attendee after they’ve registered for an event. Equally though, you could cut out this step and use your event registration form to collect the information needed for the pass.
If you want an easier life, you can use our pre-made badge generation form template.
1. From the Typeform Workspace, click the + button to create a new typeform. Click the button to add your first question and create a Welcome Screen. Here you should explain that the purpose of the form is to collect a few details from the attendee in order to make their event pass.
You can add an image to the Welcome Screen to make it more attractive. You could also customize the theme at this point if you wish.
2. Now add some Short Text questions to collect the person’s name, company name, and their job title. You can reuse the name of the company in the job title question using recall information. This helps to make the form feel more like a conversation.

Tips! Set all your questions to ‘Required‘. This will help you make sure all the attendee badges are complete.
3. Add an Email question. We need this to send the attendee a copy of their event pass. It can also be added to a QR code to help the attendee easily swap contacts at the event (we’ll show you how to do this in Part Three).
4. Next, add a File Upload question. This will allow the event attendee to upload their photo for their badge. Note that you need a Basic plan to use File Upload questions.
5. Finish off this simple typeform with an Ending to explain what happens next. In our case we’ll be sending a PDF version of their event pass to them. We’ll also send it to our event organizer who will print the pass and put it in a lanyard.
Part Two: Send results to a PDF (takes about 30 mins)
Now you’re ready to send this typeform out to your attendees and start collecting their info. The next step is to take this information and automatically create an event pass from it.
In order to create the pass we’ll merge the typeform responses into a PDF file. This PDF badge can then be sent to the attendee, and/or sent to the event organizers to be printed.
To make this badge we need to:
1. Send attendees’ data to a Google Sheet using the Typeform integration.
2. Use the Google Document Studio add-on for Google Sheets to:
- Send data from the Google Sheet to a pre-built Google Slide event pass template
- Generate a PDF from this template
- Send this PDF to the attendee and/or the event organizer
- Do this automatically whenever a new response is received
This doesn’t require any technical knowledge and should take around 30 minutes to complete. Here’s how it’s done:
1. To send your typeform data to a Google Sheet, click the Connect tab at the top and then hit the Connect button next to the Google Sheets option.

2. Sign into your Google account when prompted. Select the option to Create new sheet and give this new sheet a name.

3. Test that the sheet has been connected by filling out your typeform with test data. Open up the Google Sheet you created in the previous step and you should see a new row populated with data.

4. Now we need to take the data out of this sheet and add it to a PDF badge. For this, you’ll need to install the Document Studio Add-on for Google Sheets from here. Click the blue Install button to download it.
This integration also works with Document Studio's legacy edition, however, the instructions will differ slightly.
5. Switch back to your Google Sheet. You can access Document Studio from Extensions > Document Studio > Open.
6. Click Create Workflow.
7. Give your workflow a name and click Continue.
8. Select Process all rows and click Continue.
9. Select Create File.
10. Load up Google Slides and create your badge design in a single slide. If you want a starting point feel free to make a copy of our slide and adapt it to your needs.
Leave space in your design for your event name/logo, the personal details of the attendee, their photo, and their QR code (if you’re adding one). It might look something a bit like this:

11. Now for the cool part. We’ll pass the data from our sheet into this Google Slide using variable markers. We indicate which data we want to use by entering the name of the column in Google Sheets in between two curly brackets – i.e. {{column name}}.
Do this for all the attendee information from the Sheet that you want to include in the Google Slide, copy and paste the column names as you go.

12. Draw a text box in the slide to the size you want the person's photo to appear on the pass. Here you'll need to paste in the column name that corresponds to the file upload question.


Warning! The variable markers must exactly match the column names in your Google Sheet. The easiest way to make sure they are correct is to copy and paste them.
13. Once you’re done designing your badge in Google Slides and adding the variable markers (those curly brackets) go back to the Document Studio pop-up in Google Sheets. For the Document Template field, click Choose.
Click the Presentations tab and select the badge you just created in Google Slides. You should now see the markers you added to your slide in the drop-down next to your file.
14. Select the Google Drive Folder where you would like to save the merged file and click Done.
15. Next, we'll need to add another task to this workflow to send the PDF badge file to the attendee and to the event organizer. Click Add Another Task to do this.
16. Select Send Email.
17. This is where you can create your email template. Complete the information needed. There’s a lot you can customize, including:
- The recipient’s email address data column (from the Send Email To field)
- The email addresses of any specific people who need to receive the badge PDF (e.g. from the events organization team). We recommend adding your email address here to, so you can see how the email and the PDF attachment look.
- Subject line
- Sender’s name
- Reply-to address
- Email message body (you can use variable markers to personalize this if you like)
Make sure the checkbox for Attach all merged files generated in this workflow is checked. Then click Done once you’re done editing the email settings.
18. Click Continue.
19. Select Run workflow every hour. This will process new rows that are added to Google Sheets (responses from your typeform) every hour.
Now for the moment of truth. When you click Save, a dropdown will appear, select Save and Run. This will run the test data you've previously submitted.
Warning! When you click Save to turn on the workflow, a bunch of new columns will be added to your Google Sheet automatically. Don’t panic, these are used to help configure the settings. Just leave them alone to work their automation magic.
20. Click Run Workflow to turn this workflow on.
21. And here you have it, the finished badge in PDF format:

Tips! If you notice that information is missing from the PDF or that nothing has been merged, go back to your Google Slide and make sure that all of the {{variable markers}} match the corresponding column names.
Part Three (optional): Auto-generate a QR code and add to the pass (takes about 30 mins)
If you really want to wow your attendees (or indeed your boss) you can add a personalized QR code to each badge. QR codes can store information about the attendee which can be scanned and read by a QR code reader at the event. For example, you could add the attendees’ contact details or Web site address to the QR code to enable business card-free networking.
To set this up, we’ll need to integrate your typeform with a third-party QR code generator. In this solution, we propose integrating with Esponce, via Zapier. Esponce starts at $12 per month, and a 14-day free trial is available.
Here’s the process for generating a QR code and adding it to your PDF event badge:
1. Start by signing up for a free Esponce trial here. You can access the trial without parting with any credit card details.

2. Now hop over to Zapier and sign up (again, a free trial is available) or log in, if you already have an account.

3. We’re going to make a ‘Zap’ (another word for a ‘workflow’) in Zapier. It will create a QR code in Esponce when a Typeform is submitted. The same Zap will then send details of this QR code to the Google Sheet we made previously. We can then use Document Studio to send the QR code to the Google Slide, which will then appear on the PDF event badge. Got it? Good. Let’s kick off by clicking Make a Zap.

4. Start by searching for Typeform and choosing it as the Trigger app in the workflow.
5. The trigger for the Zap will be the submission of our typeform (it’ll be the only option selectable).
6. When prompted, connect to your Typeform account by entering your login details. Now select the typeform that you want to trigger the Zap (i.e. our badge generation form).
7. When prompted, pick a sample response to your typeform. This will make it easier to see what data to use where in the following steps.
8. Now let’s tell the Zap what we want to happen when the typeform is submitted. Click the +Add a Step button in the side panel and choose Action/Search.

9. Search for and select Esponce as the action app.

10. We’ll tell the Zap to create a new trackable QR code as the action…

11. When prompted, connect to your Esponce account using the API key (find this by going to Settings > API in Esponce). We need to define a name for the QR codes based on one of the answers to your question. In our case, we’re going to use the person’s name. This will make it easy to find our QR codes in Esponce if we need to.

12. Now decide what content you want to encode into the QR code. For the purposes of an event badge it might be good to use the person’s name, company name, and email address, This means that while networking someone can just scan their badge to get all this information.
Select the questions in the typeform whose answers will be used to populate the QR codes, like this:

13. You can now send a test to Esponce to make sure the QR code is being generated from the typeform response.

14. Go to Esponce and login to your account. Click on the QR codes tab and you should see your new entry in there. Click on it to view the QR code for the attendee and check that the right data appears.

15. Now we’ve got the Zap to generate a QR code from each response to our typeform, let’s now send the QR code image to our PDF event badge. Remember that the PDF pulls in information from our Google Sheet. So, now we need to make a Zap that sends the QR code to the Sheet.
Let’s add a column in our sheet to store the QR code information. Load up the badge information sheet and add a title to the furthest column on the right calling it “QR code“.

16. Back in Zapier, add another Action step to your Zap and choose Google Sheets as the action app.

17. In this action, we want to find the row in the Sheet that matches the person whose QR code we’ve generated. Choose Lookup Spreadsheet Row and hit Save + Continue.

18. Connect to your Google Sheets account when prompted. Now let’s find our attendee. Select your badge registration worksheet from the drop-down menus.
We’re going to look up a person based on their email address, since this should be unique to each attendee. Set the email address column as the Lookup Column and the email address data from the typeform as the Lookup Value, as shown here:

19. Test that the row has been found based on the sample typeform response. Zapier will display the contents of all the columns in that row when you click ‘view your spreadsheet row‘.

20. Now we’ve found the row in the Google Sheet, let’s update it with the link to the QR code that has been generated. Add an Action step and select Google Sheets as the Action app. This time we want to Update Spreadsheet Row.

21. Connect to your Google Sheets account when prompted. Enter the details of your worksheet in the first two drop-downs. Now we need to specify that the row we want to update is the one we looked up in the previous step in the Zap. To do this choose Use a Custom Value and select the row lookup step as the Custom Value for Row ID.

22. Now to add the link to QR code image into the ‘QR code’ column we created in step 16. The URL of the QR code image download is formed using the unique ID of the QR code. It is appended to the address “https://www.esponce.com/create/download/“, and “.png” is added to the end. So for example, the link to the QR code might look like:
https://www.esponce.com/create/download/QRcoDeID.png
Let’s insert this into the QR code column by pasting in the “https://www.esponce.com/create/download/” followed by the unique ID, followed by the “.png” part:

23. After clicking Continue to save the setup, send a test to your Google Sheet when prompted. You should see the QR code has been added to the row corresponding to the sample response”.

Click on this link to view the QR code image in your browser.

24. Now you need to update your Google Slide badge template to pass this QR code link as a variable, so it will be merged into the PDF.
Go back to your slide, draw a text box to the size you want your QR code, and add the variable marker (remember the curly brackets?) of the QR code column name.

25. Flick back to your Google Sheet and load up Document Studio from the Extensions tab. Select the workflow you previously created in part two and click Edit from the dropdown. Select the Tasks tab and next to the Create PDF file task, click Edit.
Click the dropdown under {{Markers}} and select Refresh Markers.
26. Great. We’re almost there. Now go back to your Zap and turn it on (give it a name if you haven’t already).

27. Now, test it out by submitting a test entry in your typeform.

Warning! When testing, make sure you don’t use the same email address every time. Remember that this is the unique identifier of the row so if you use an email you’ve already used in a response it will break the Zap.
28. Go back to your Google Sheet and you should see a new row with the details you just entered, including the link to the QR Code. Go to the Save tab in Document Studio to save and process the badge.
29. The PDF badge, complete with QR code will now be sent to the email address you entered in the test typeform entry. To view it right away click Preview and then Test Workflow in the Save section of Document Studio.

Now, every time someone submits your Typeform a PDF badge will be generated and sent to the attendee and your event organizers – all without you having to lift a finger!
How did you get on?
Did you end up following the tutorial and creating a PDF export system? If so, would you be willing to share with us what you used it for? Fill out this typeform and you never know, it could be you we’re featuring in a forthcoming inspiration article!
If you got stuck halfway through the tutorial, don’t worry. Just drop us a line by clicking the Contact Support button below this article and our team will do their best to help you out.