


Redirect form respondents to a prefilled Shopify cart
With Typeform, you can use nearly twenty question types to grab your customers’ contact details and collect new orders for your shop’s products.
In this guide, we’ll go over creating a form that recommends products to customers based on their answers to form questions, then redirects them to a shopping cart containing those same products right after they submit the form!
To build this flow, you’ll need:
Read on to learn how it’s done, or click a section name to jump there:
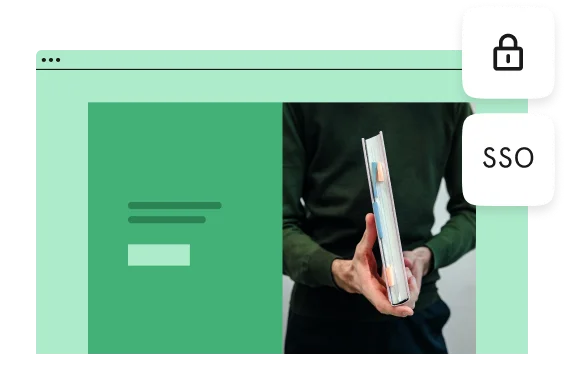
Build a product recommendation typeform
Product recommendation typeforms make the shopping experience fun and personalized for your customers. We’ll use just a few questions and the magic of Logic to give each form respondent the perfect product suggestion.
1. If you don’t already have a typeform you’d like to use, click + Create typeform from your Workspace to create a new one:
Click Start from scratch to create a blank form. In this walkthrough, we’ll create a clothing recommendation form.
2. Now, add several End Screens, one for each product you’d like to recommend. To add End Screens, click the + button next to Endings, on the left-hand side of the Create panel. We’ve added four End Screens, for four clothing products:
Not sure how End Screens work? This guide has all the details you need.
3. Customize the End Screens by adding images and descriptions of your products to each one. Keep the Button option in the right-hand sidebar toggled on - we’ll use it to add links to shopping carts containing that product later on!
4. Time to add questions to the typeform! Here, we’ll add a few Multiple Choice questions. Using Multiple Choice questions makes it easy to send form respondents down different paths depending on their answers. In the end, these paths will decide which End Screen each respondent sees.
We’ll add three simple Multiple Choice questions. To add questions to a typeform, just click the + sign next to the Content header, on the left-hand side of the Create panel:
The first question asks whether respondents prefer summer or winter:
We wrote this question because two of the recommended products are summer clothes, and two are winter clothes.
The second question asks whether respondents prefer a sleek or casual look:
We wrote this question because one of the recommended products is a sleek winter coat, and another is a pair of casual, yet comfy, boots.
The third question asks which item of clothing is respondents’ favorite: a pair of jeans or a comfy T-shirt:
We wrote this question because one of the recommended products is a denim skirt, and another is a breezy summer top.
These super-simple questions are all you need to create a product recommendation form, but you can add as many questions as you like. Get creative with different question types and answer options! For example, this guide covers creating a more detailed product recommendation form.
You don’t have to limit yourself to product-related questions, either! Check out the full list of question types to learn how to collect information like contact details, and read more here about designing your typeform to match your brand.
5. Now, use Logic to set up branching paths between the Multiple Choice questions added in the last step.
Click Logic in the right-hand sidebar of the Create panel:
6. In the center of the screen, you’ll see the Logic Map. The Logic Map is a visual overview of the different question paths that respondents take when answering your form.
The form doesn’t have any Logic yet, so the Logic Map looks like a straight line. Respondents will see all of the Multiple Choice questions, one after the other:
Some of the End Screens appear with broken link icons, because they’re not connected to Logic yet. We’ll fix that soon!
7. Click the first Multiple Choice question to add a logical rule. In the left-hand sidebar, add a condition saying that respondents who answer winter should see the second Multiple Choice question, which asks whether respondents prefer a sleek or casual look:
All other respondents (in other words, respondents who prefer summer) should see the third Multiple Choice question, which asks whether respondents prefer their favorite jeans or T-shirt:
Click Save to save the rule.
(Not sure how adding Logic works in Typeform? Here’s a guide on Branching and calculations to get you started!)
8. Now, time to add a logical rule to the second Multiple Choice question. Click on the question from the Logic Map to add Logic:
Add a condition saying that respondents who prefer a sleek look should see End Screen A, which recommends a black peacoat:
All other respondents (in other words, respondents who prefer a casual look) should see End Screen B, which recommends brown suede boots:
Click Save to save the rule.
9. Have you guessed what’s next? That’s right, adding a logical rule to the third Multiple Choice question! Click the question from the Logic Map:
Add a condition saying that respondents who prefer a favorite T-shirt should see End Screen C, which recommends a summery top:
All other respondents (in other words, those who prefer jeans), should see End Screen D.
Finished - awesome job! The Logic Map looks great - each flow is clearly visible and easy to follow:
Now, click Question in the right-hand menu, to the left of Logic, to move on to the next step.
Link typeform End Screens to prefilled Shopify carts
Now that you’ve finished adding Logic to your typeform questions, it’s time to add a link to each End Screen that directs customers to a shopping cart that already has the item they chose.
1. To redirect customers to the right shopping cart after they submit the typeform, you’ll need to fill in the Button link field for each End Screen. This will create a clickable button on the End Screen that customers can interact with.
You’ll add the link in the Question menu for each End Screen:
2. To create the link, pretend you’re a shopper at your own Shopify store. Open your store catalog, and click on one of the products you’ve recommended. Here, we’ve opened the product that corresponds to End Screen A - a black peacoat:
3. In the URL for the product page, you’ll see a string of numbers after variant=. Copy that string - this is the reference for that product, also known as a variant in Shopify:

Tip: Having trouble finding the variant? See this Shopify guide to variants or contact Shopify support.
4. Now, go back to your End Screen in Typeform. In the Button link field, add a URL in the following format:
https://my-store-name.myshopify.com/cart/variant
Instead of my-store-name, insert the name of your Shopify store. Instead of variant, paste in the variant string you copied in the last step. Here’s how the link for the black peacoat in our Typeform Shopify store looks:
Tip: You can add more than one variant to your URL. Just separate the two variant strings with a comma, like so: https://my-store-name.myshopify.com/cart/variant1,variant2. You might do this if you want to include a free gift along with the recommended product! You can also specify product quantities by adding a colon, followed by the quantity, after the variant string, like so: https://my-store-name.myshopify.com/cart/variant:2. Check out this Shopify guide for more information on creating checkout links.
5. Change the button text under Button, if you’d like:
6. Repeat steps 2-5 for the other End Screens you created, so that each product has its own checkout link.
7. Finally, click the Publish button in the top right of the screen to turn your typeform live.
Check out this guide for tips on how to share your typeform with the world!