

Want to trigger notifications to different email addresses, or send automated emails with different content based on answers to your typeform? Great news, you can do that by creating conditional email notifications using a Zapier connector. (Remember, we offer a built-in Respondent notification feature, as well!)
Using Zapier to connect your typeform to an email app like Gmail, you can set up notifications based on respondents’ answers. Read this Help Center article explaining how to get started.
There are two examples of conditional notifications in this article:
1. Trigger emails to different email addresses based on the answer given
2. Trigger emails with different content based on the answer given
Trigger emails to different email addresses based on the answer given
Let’s say you are the Head of HR, and you have a Job application typeform posted on your website. You have three recruiters on your team, and each of them is in charge of recruitment for one of these three positions/areas:
- Developers
- Customer Support
- Marketing
There’s a step-by-step guide to building an awesome job application form here, but for demonstration purposes, we’ll use a simplified version. In order to show how it’ll work, we’ve also added a Question as a first field where candidates can select the position or area they want to apply for.
You don’t want to cram your recruiters’ inboxes with irrelevant emails, right? It’s more efficient to send a notification email only to the assigned recruiter.
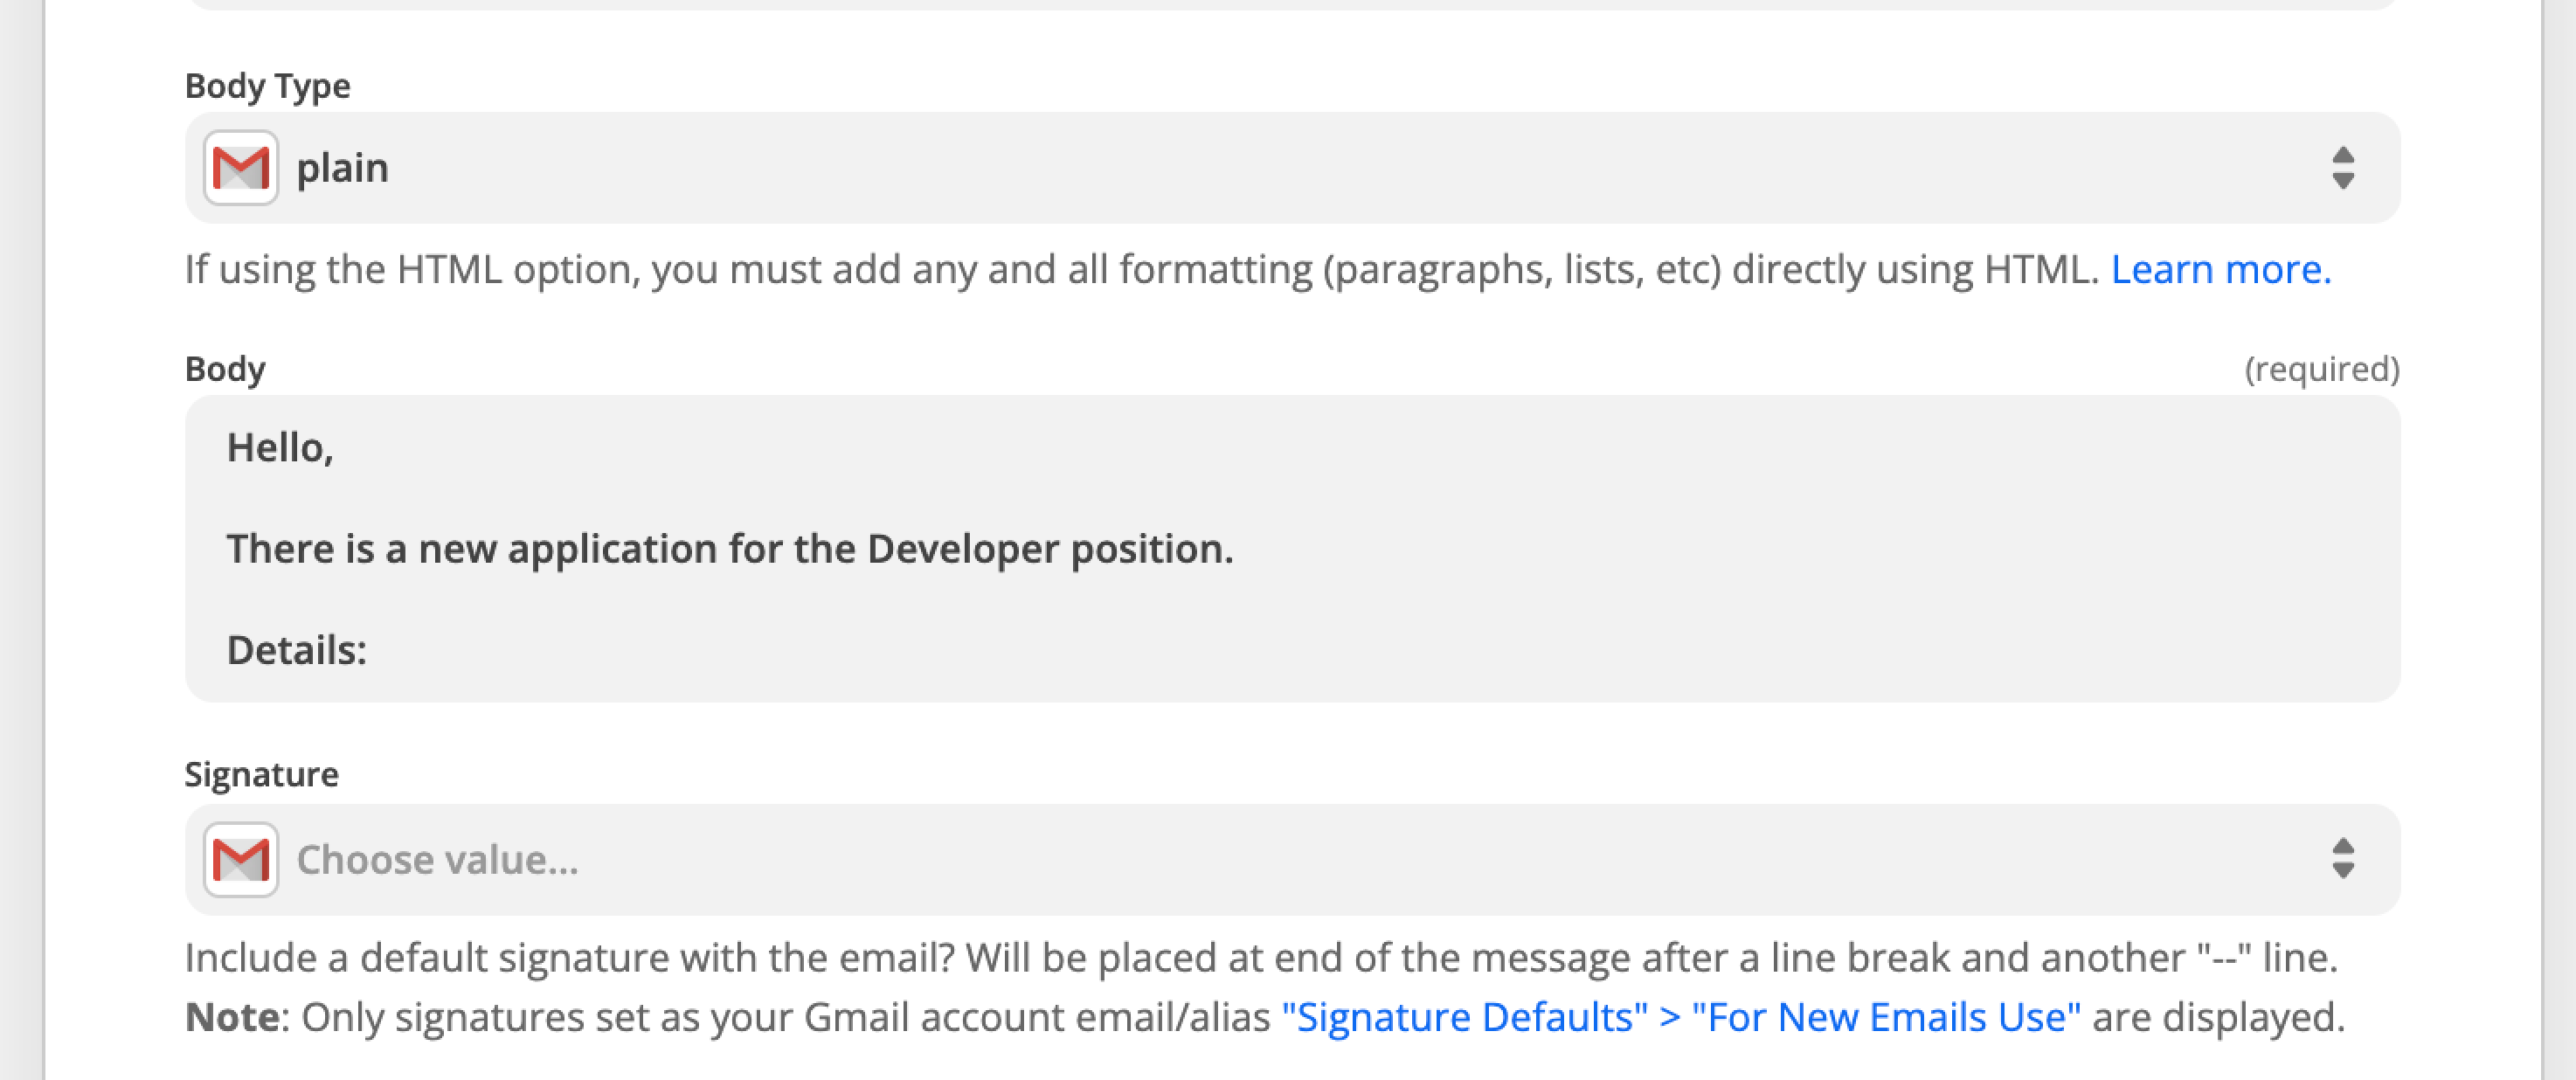
Start by following the steps in the article up to and including Step 4. Then create one specific email template. In our example we are using the position "Developer":
1. Add the email address for the recruiter in charge of developers to the “To” field.
2. Add text to the email specific to the Developer position:
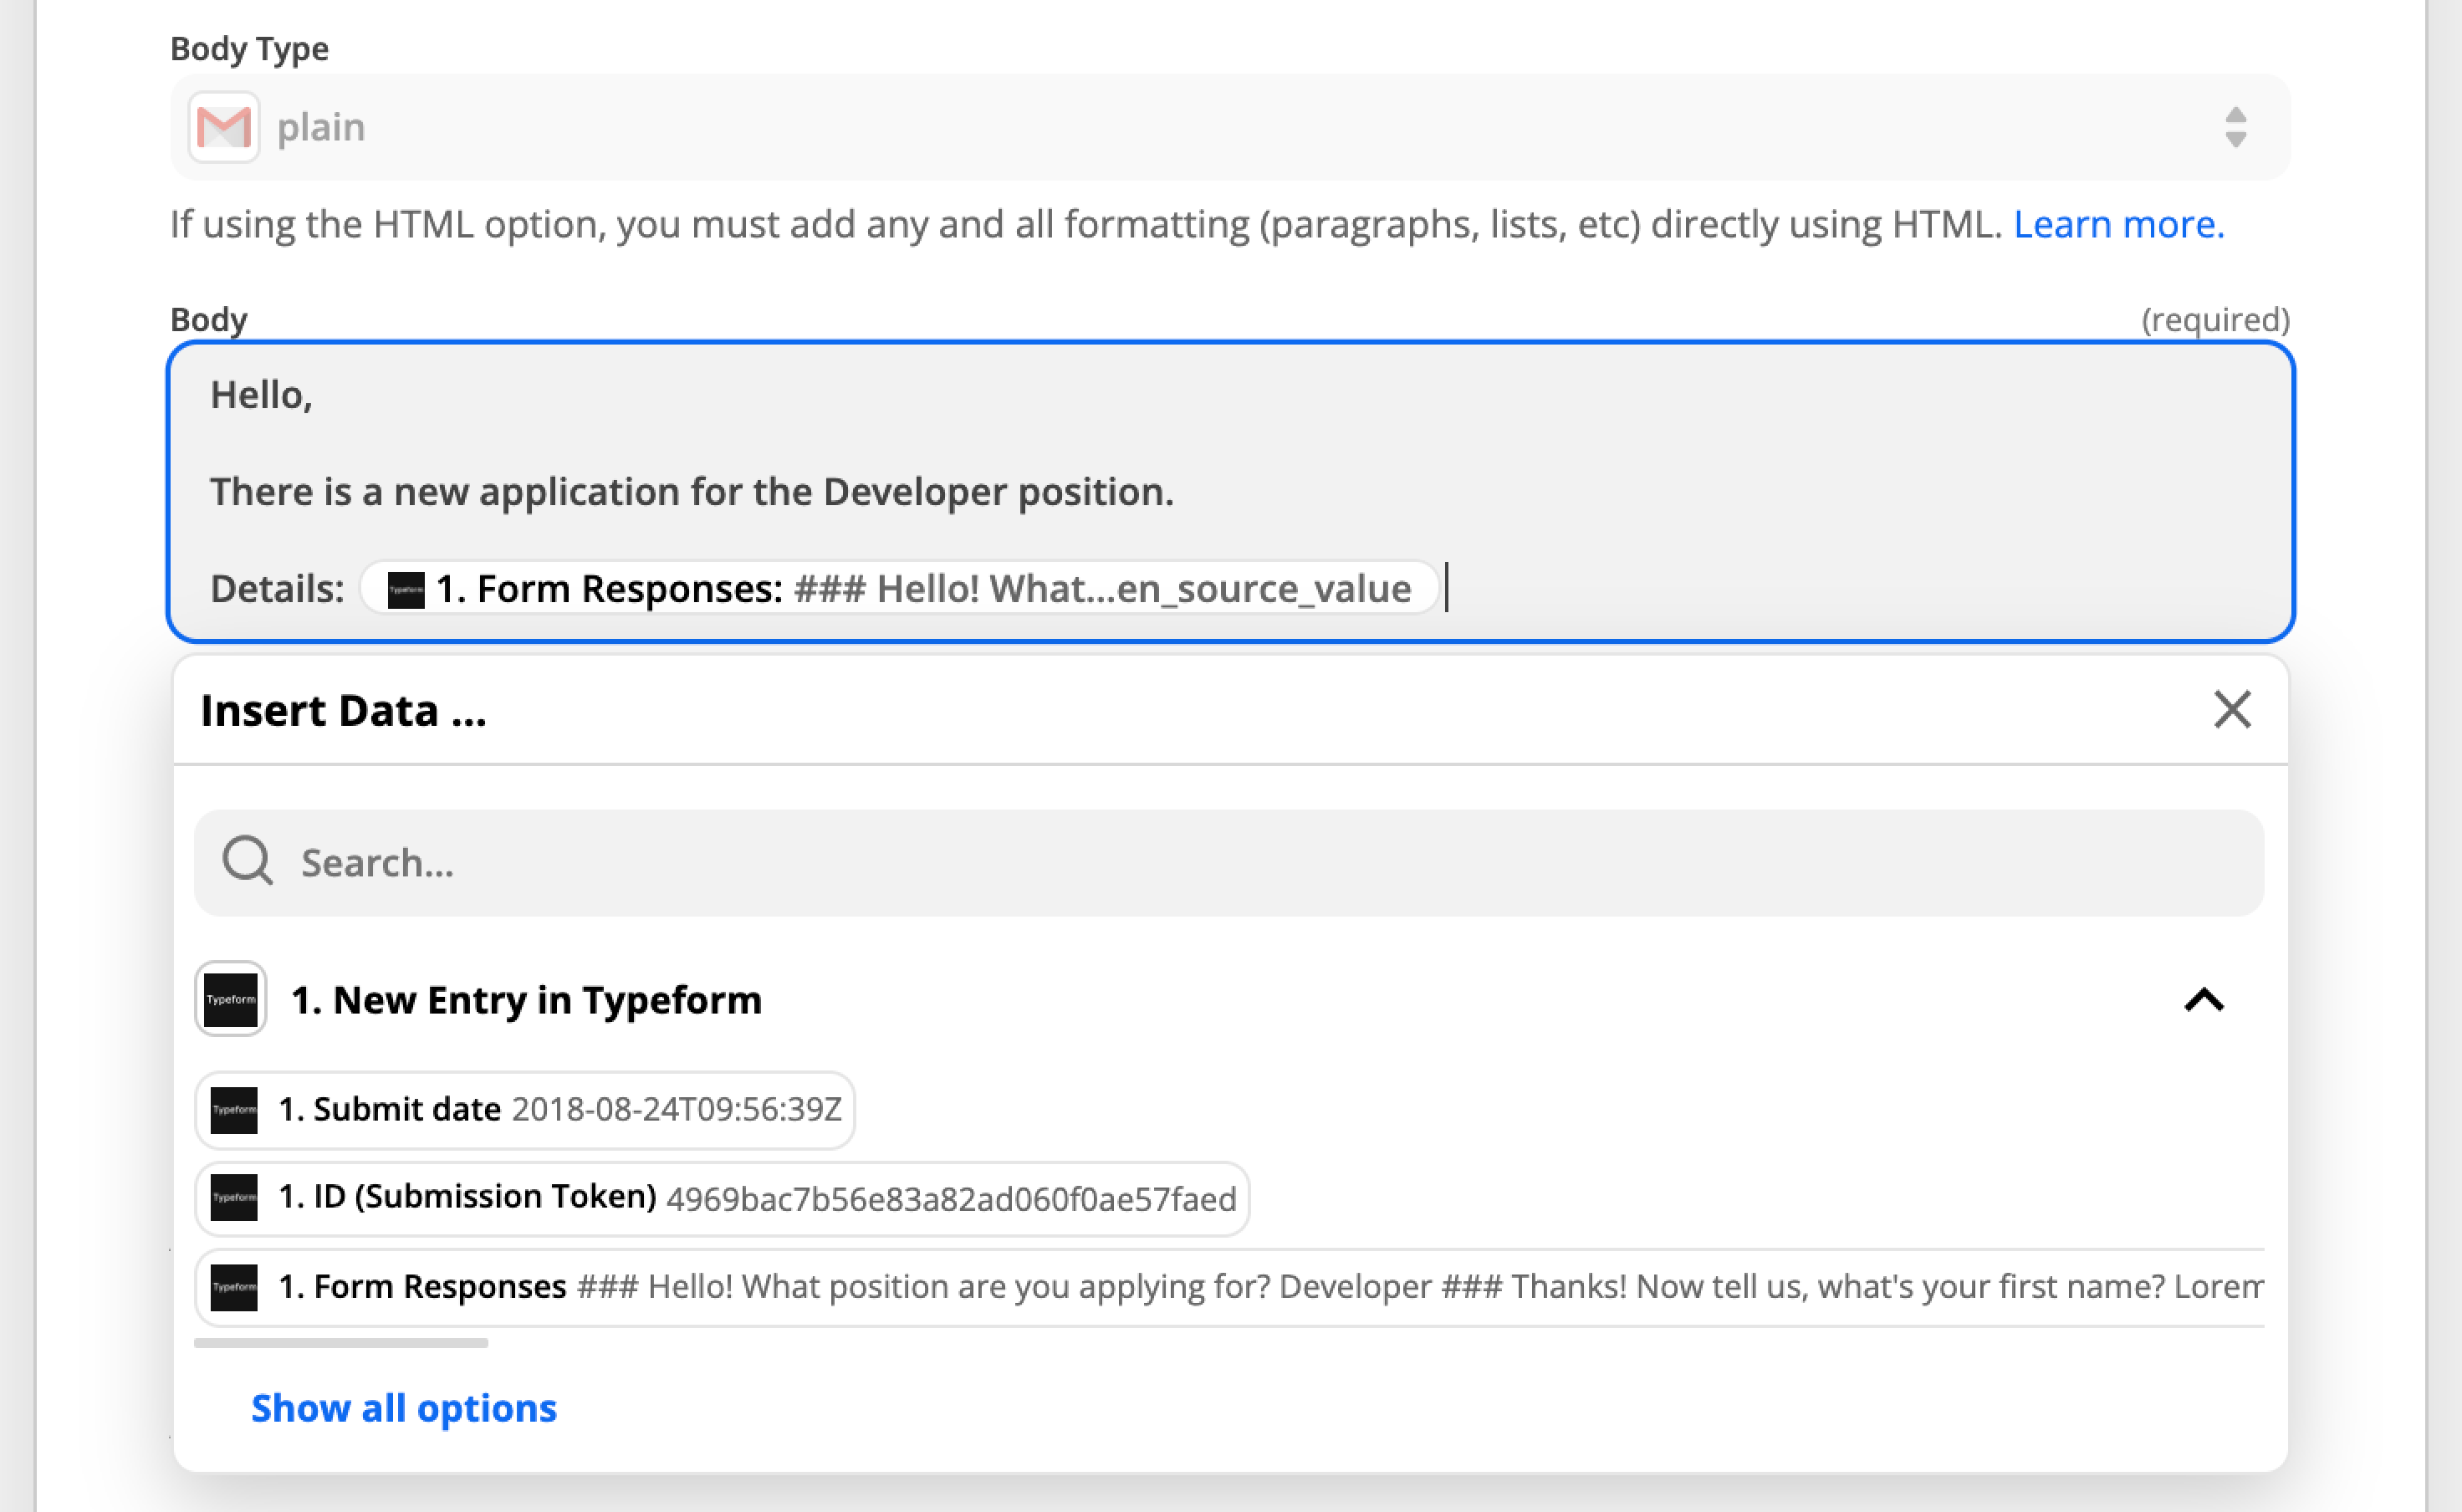
3. And use the "Insert Data..." dropdown menu to add fields from the typeform to the body of the message, like Form Responses, which will send all typeform responses in the email:
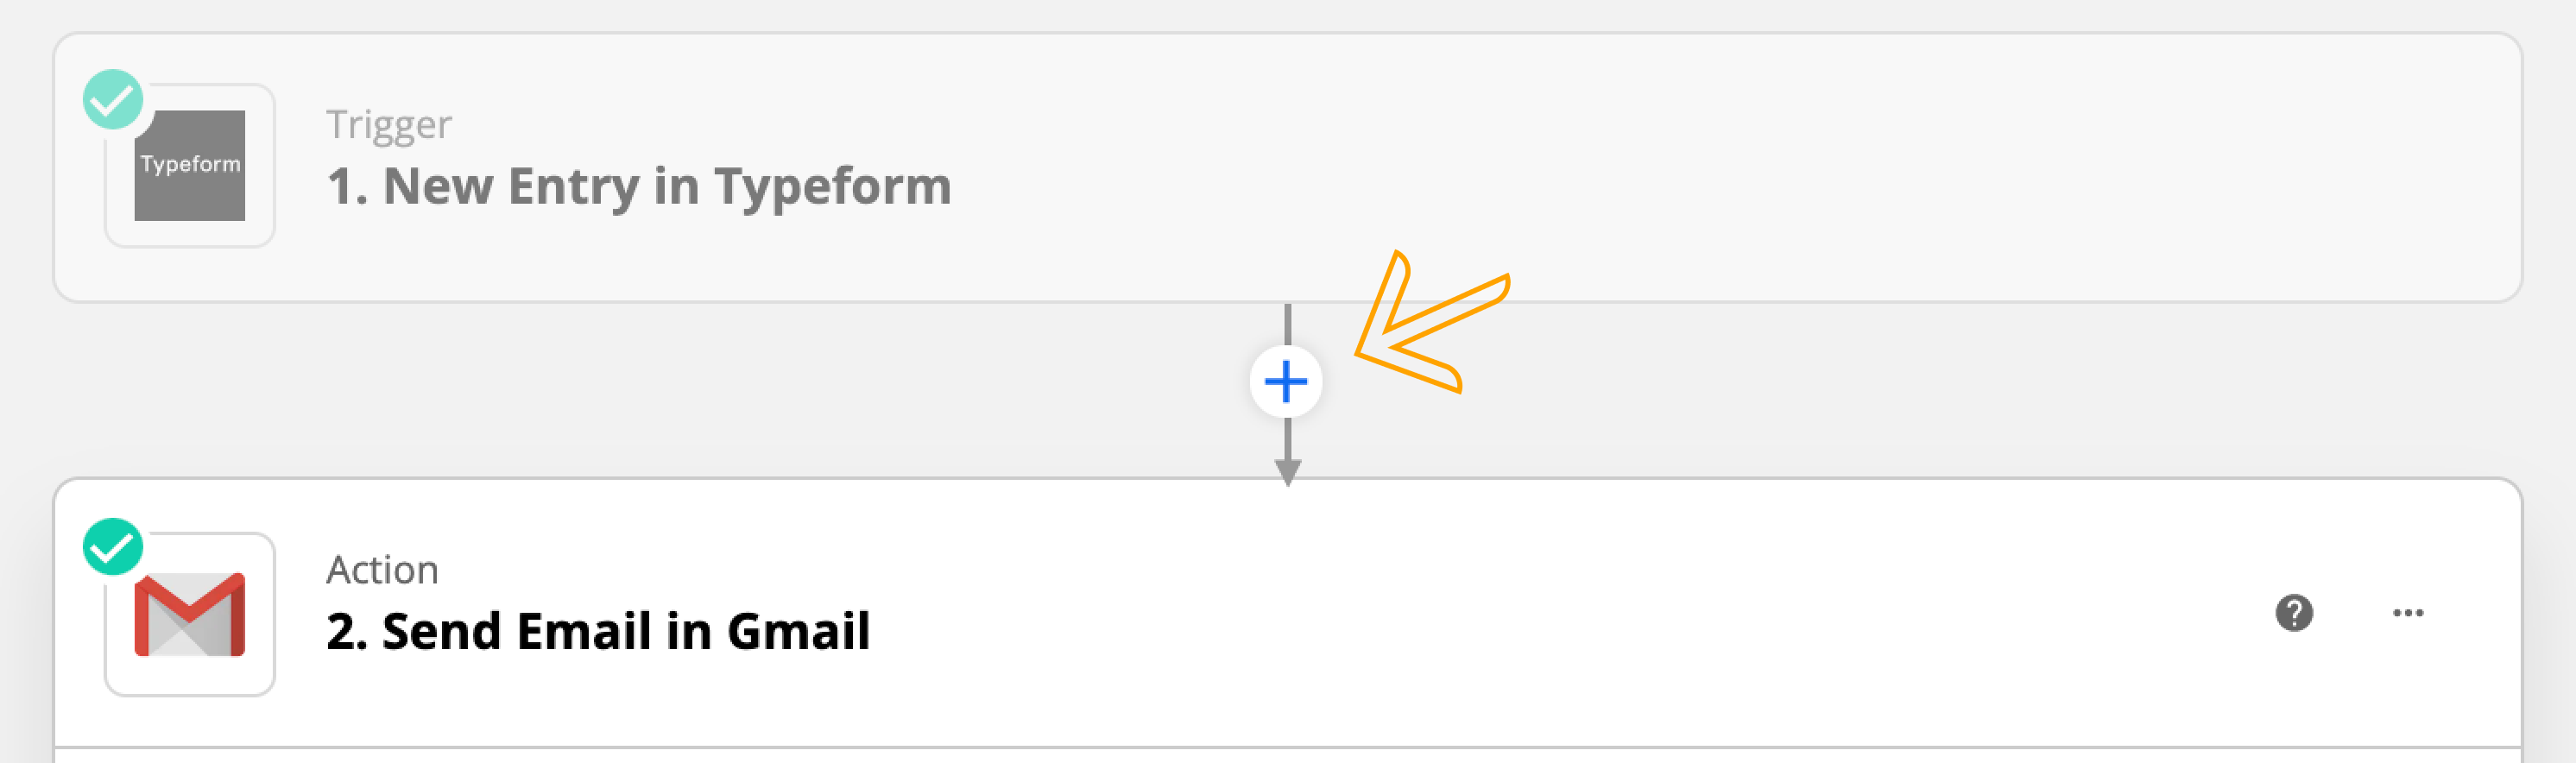
4. Once you’re done configuring the email, click on the + icon between the Trigger (New Entry) and the Action (Send Email):
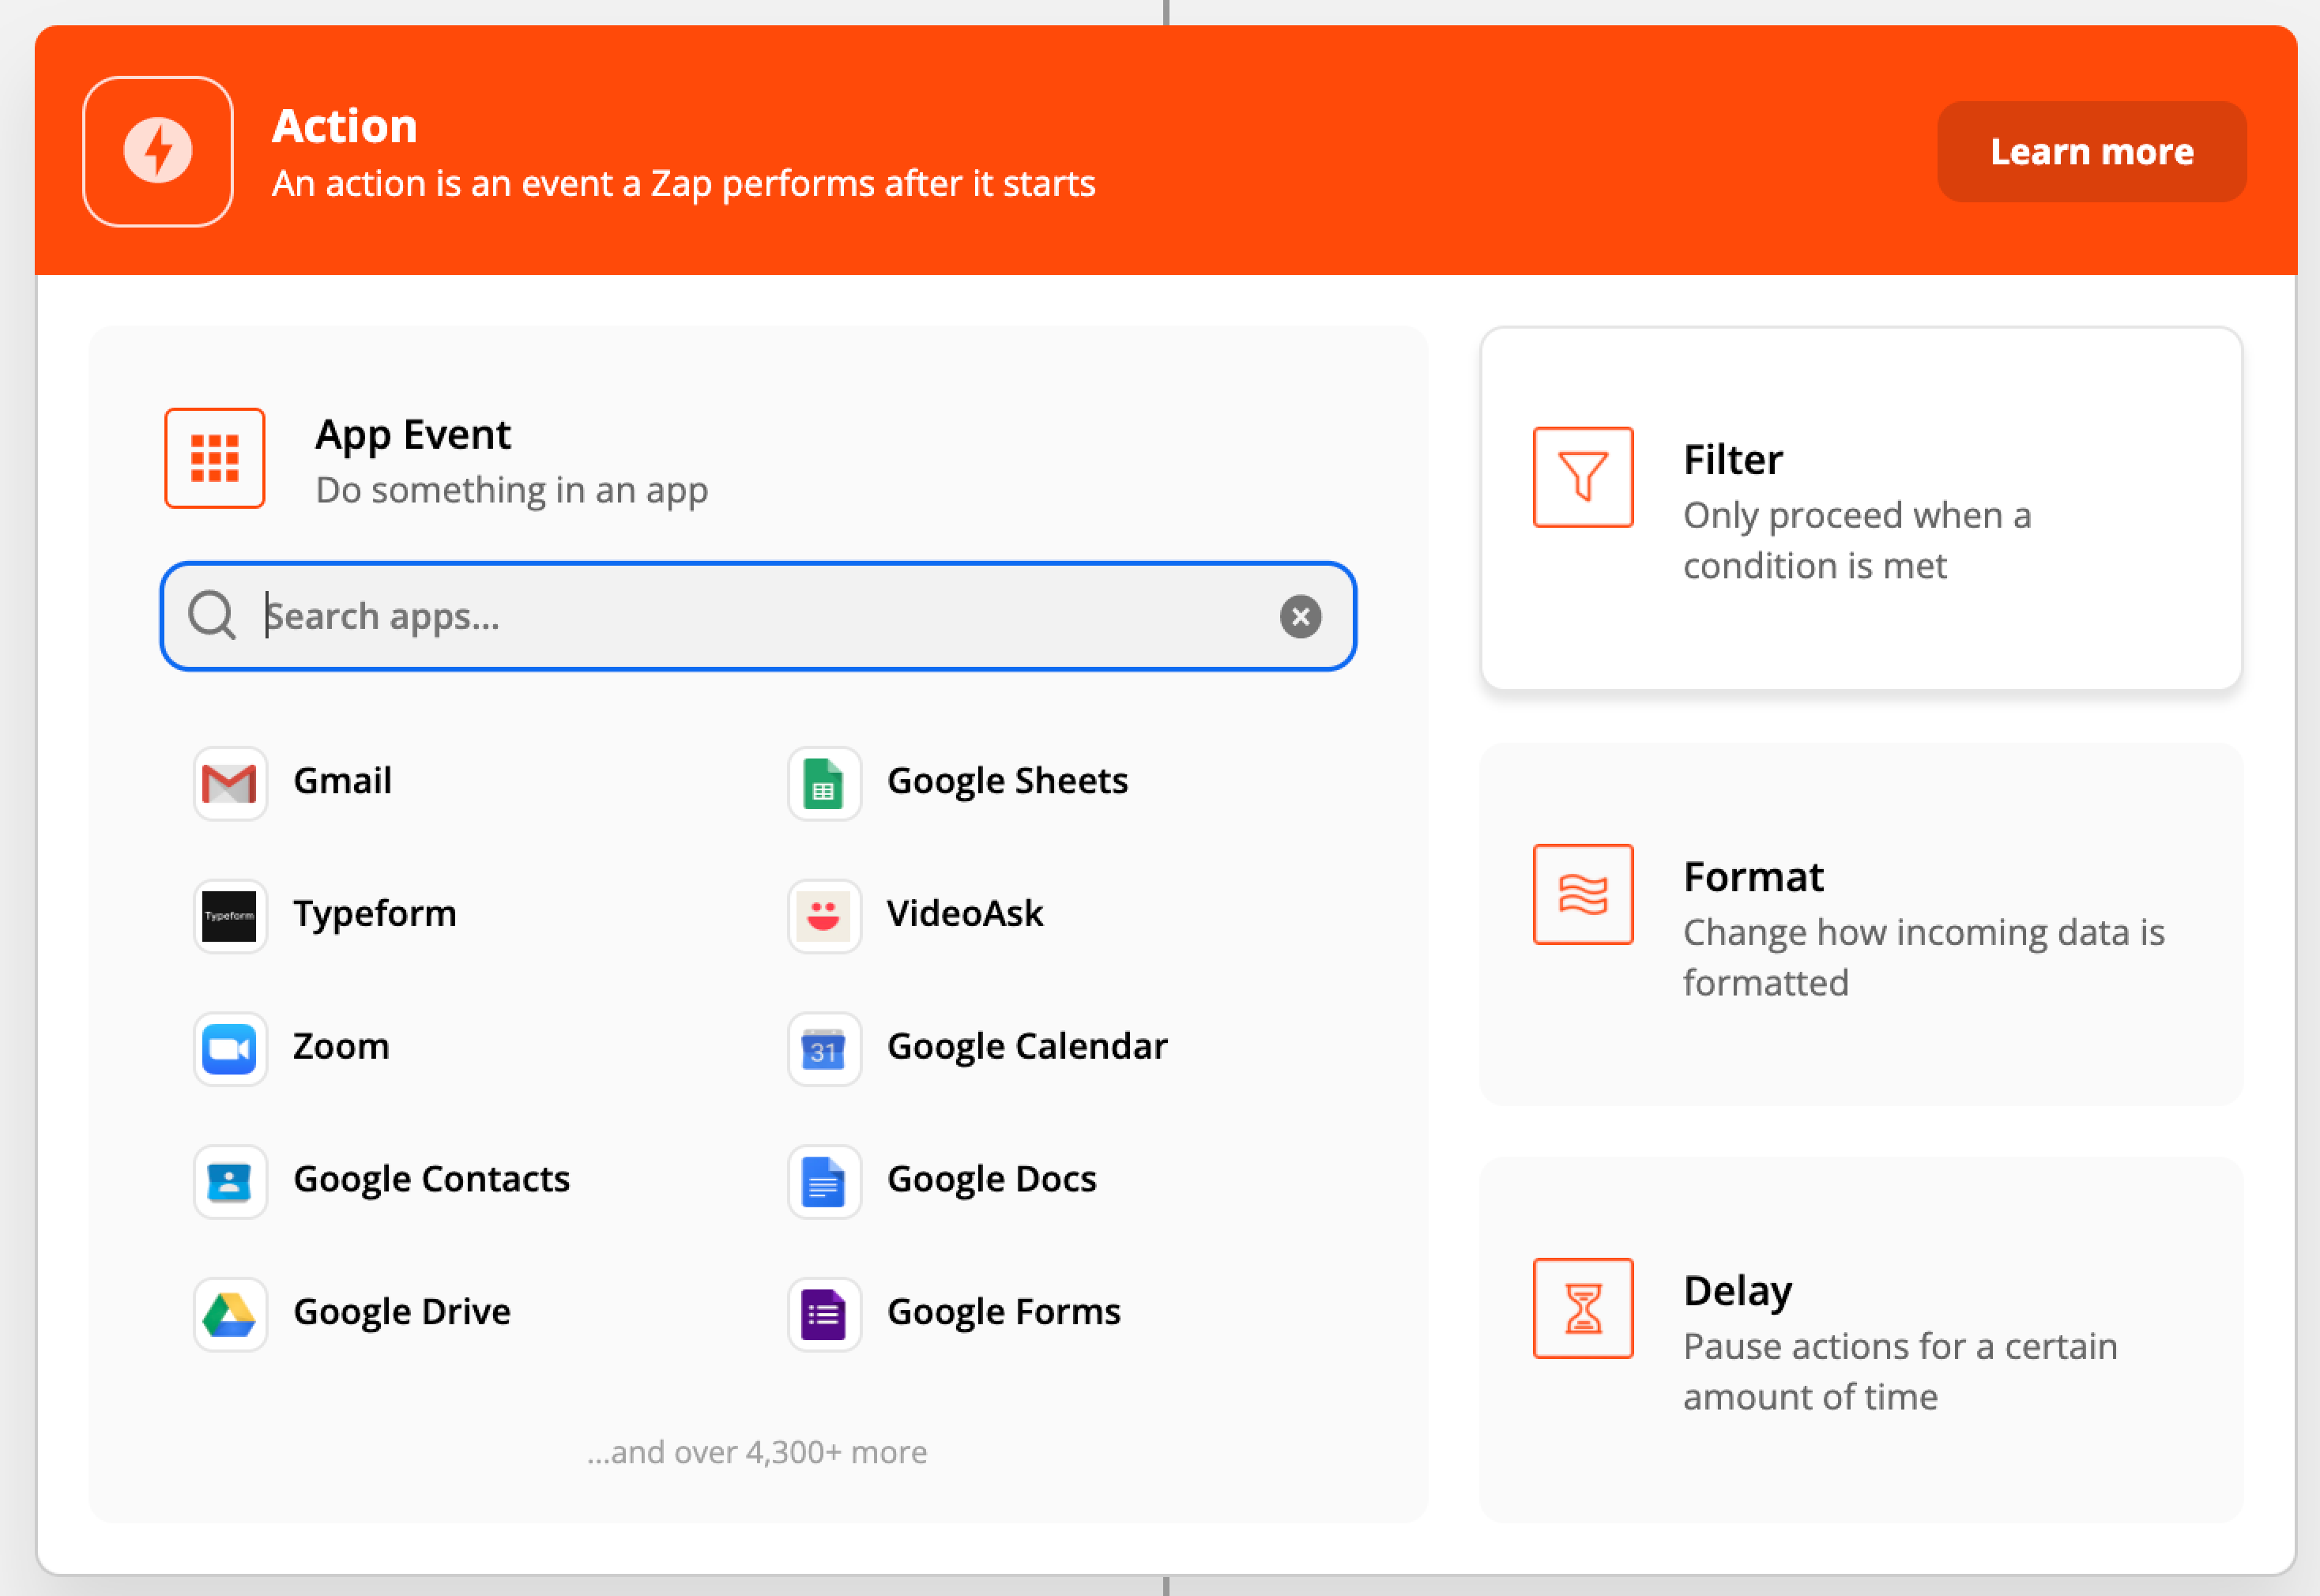
5. Click the Filter block in the menu that appears:
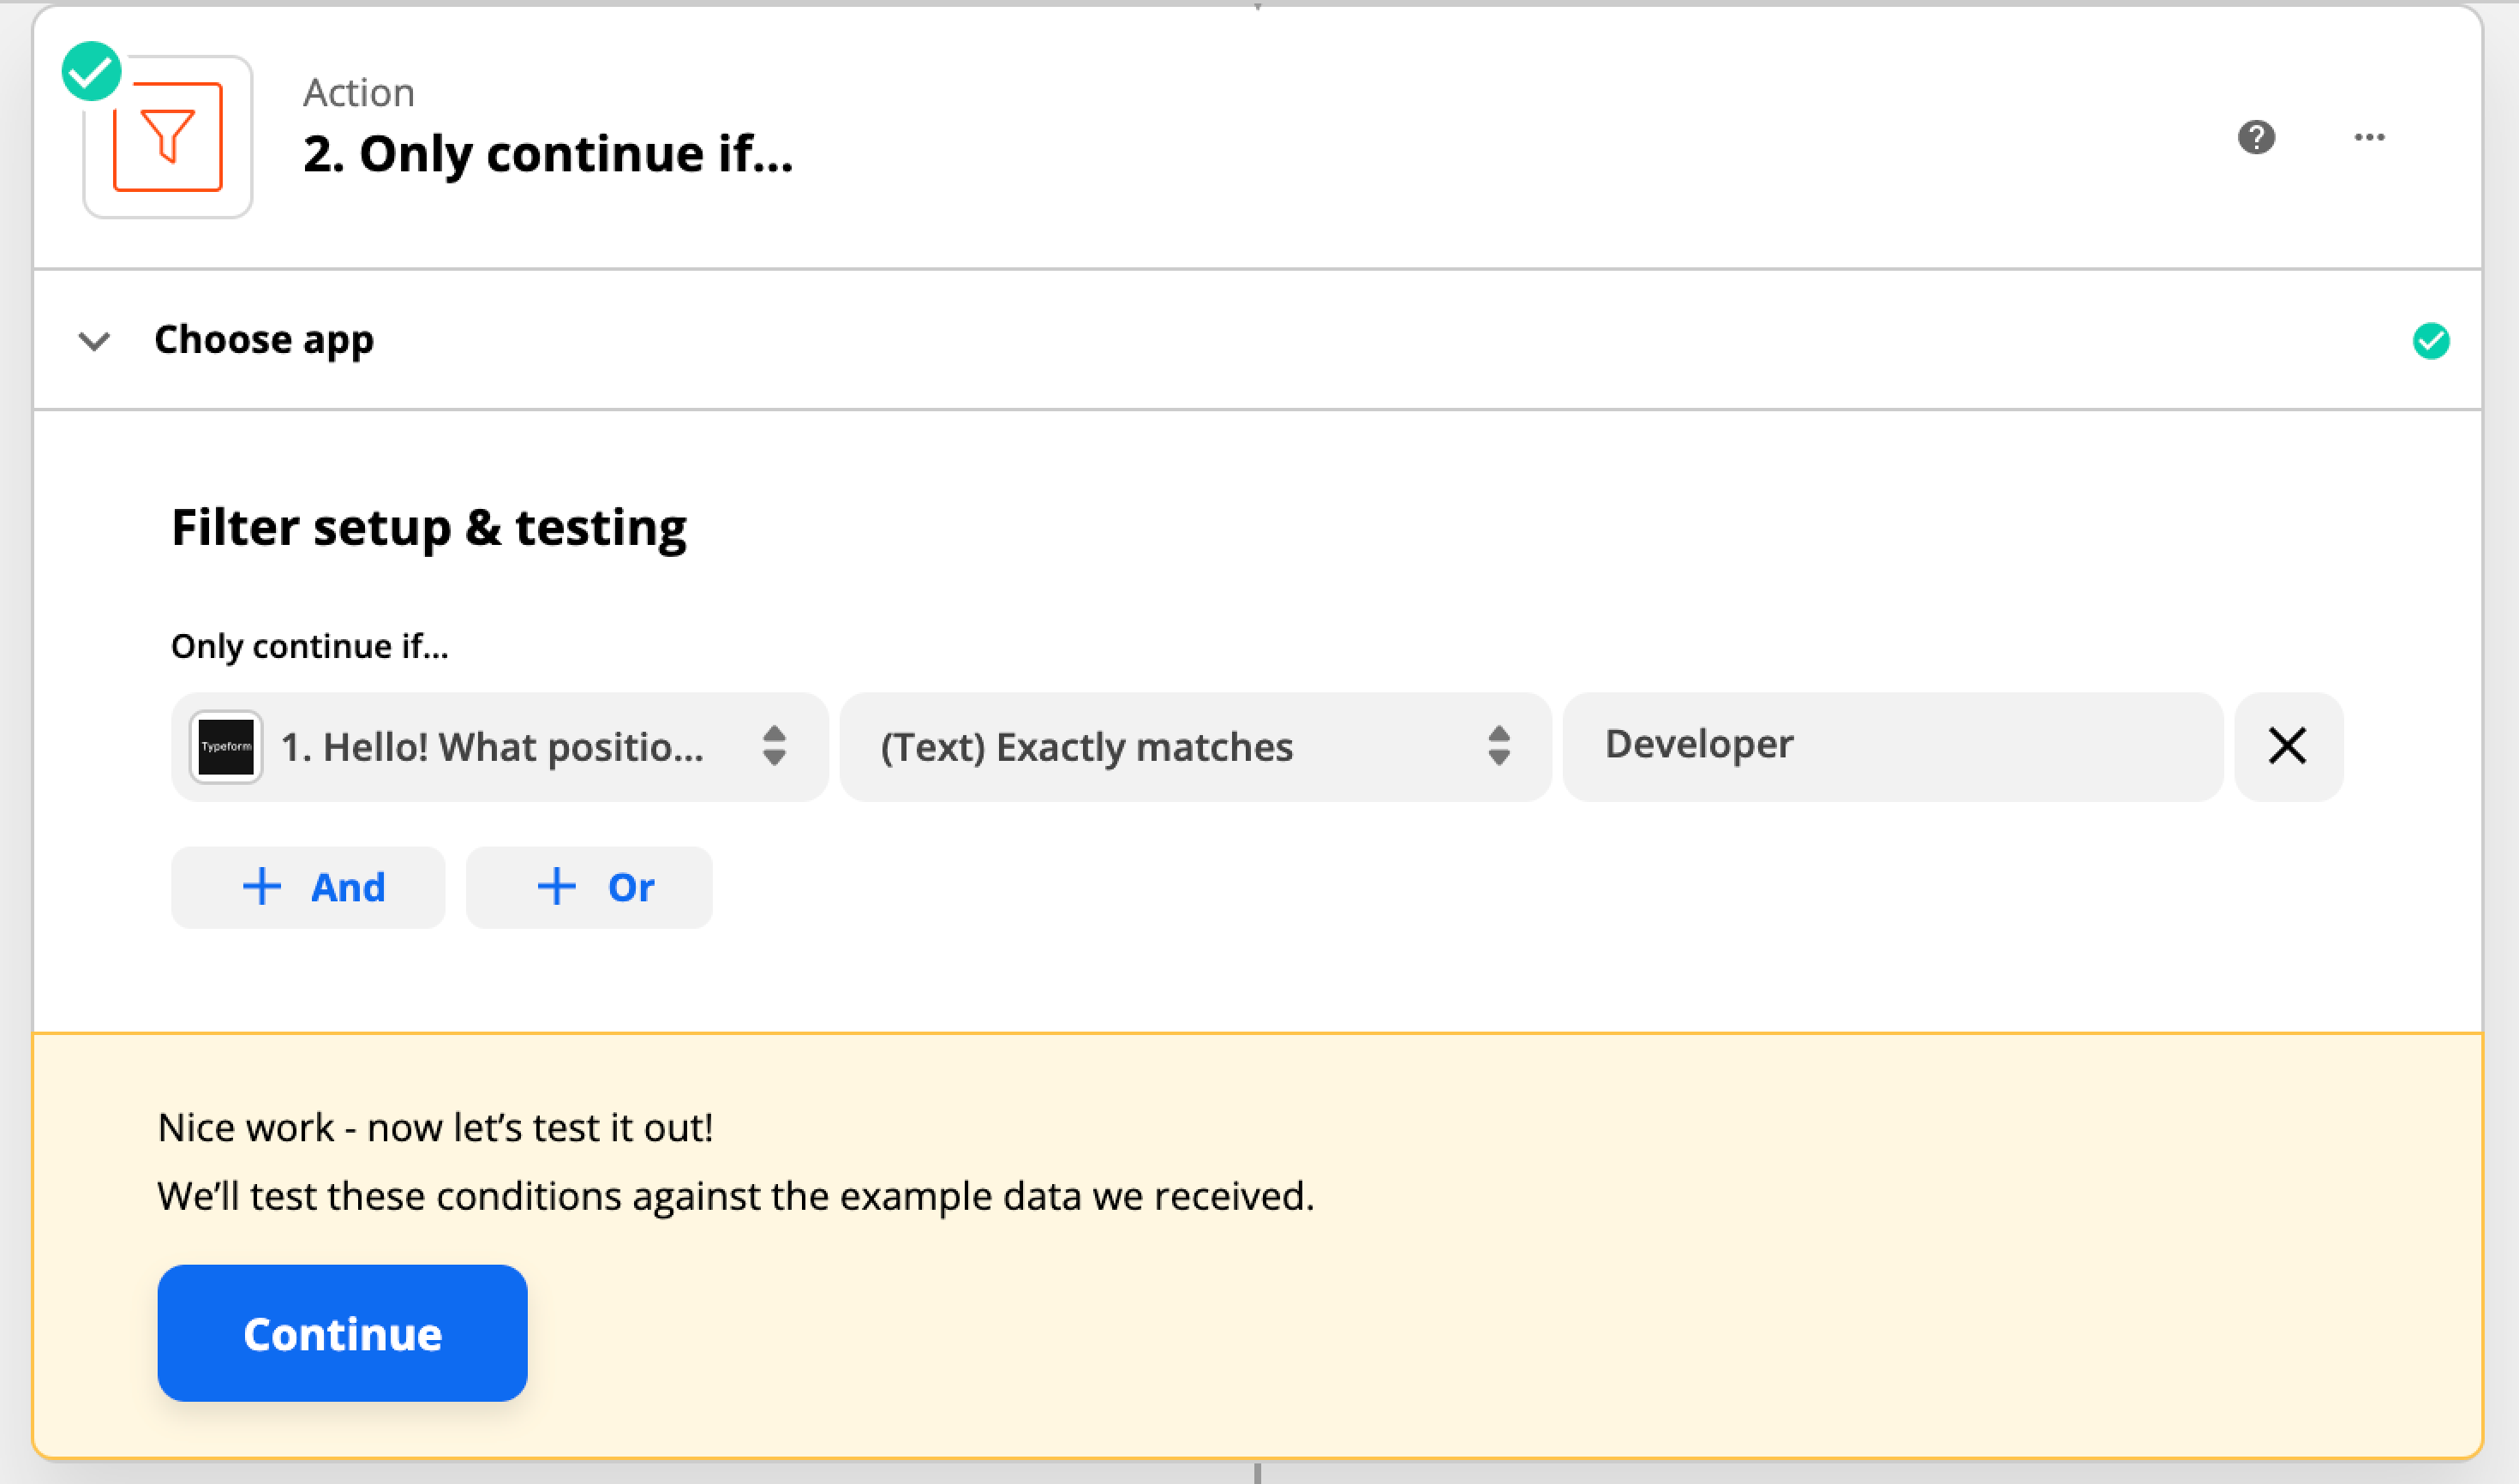
6. Set up the filter by adding conditions, and click on Continue.
In our example, we only want the email sent if the answer to the question “Hello! What position are you applying for?” is “Developer”. Therefore, we used the condition: (Text) Exactly matches “Developer” as seen in this screenshot:
This will ensure that the Zap will only run if the condition is met.
7. Finally, make sure you turn the Zap on!
Please note that you’ll have to set up Zaps for each scenario. For our example, we need to set up three Zaps:
Send email to email address #1 if the answer to Question 1 is "Developer": as described above.
1. Send email to email address #2 if the answer to Question 1 is "Customer Support Advocate": follow the steps described above but…
- Add a different email address under Step 1
- Configure the Subject line and Body of the email accordingly under Steps 2 & 3
- Finally, select “Customer Support Advocate” when setting up the filter under Step 6.
2. Send email to email address #3 if the answer to Question 1 is "Marketing": follow the steps described above but…
- Add a different email address under Step 1
- Configure the Subject line and Body of the email accordingly under Steps 2 & 3
- Finally, select “Marketing” when setting up the filter under Step 6.
Trigger emails with different content based on the answer given
Now, let’s imagine that you have a digital agency and you have a lead generation typeform.
You’d like to send automated follow-up emails, but the content should be configured and adjusted according to the client’s needs. You created four different emails depending what is selected under Question 1 and you’d like to send the relevant content to the relevant audience: 
Test it for yourself! Submit the above typeform a few times with different answers and see if and when you get an email notification. To be able to test the form, you’ll have to add a real email address to the email field.
This is how you can set this up with Zapier:
1. Start by following the steps in this article up to and including Step 4. After that:
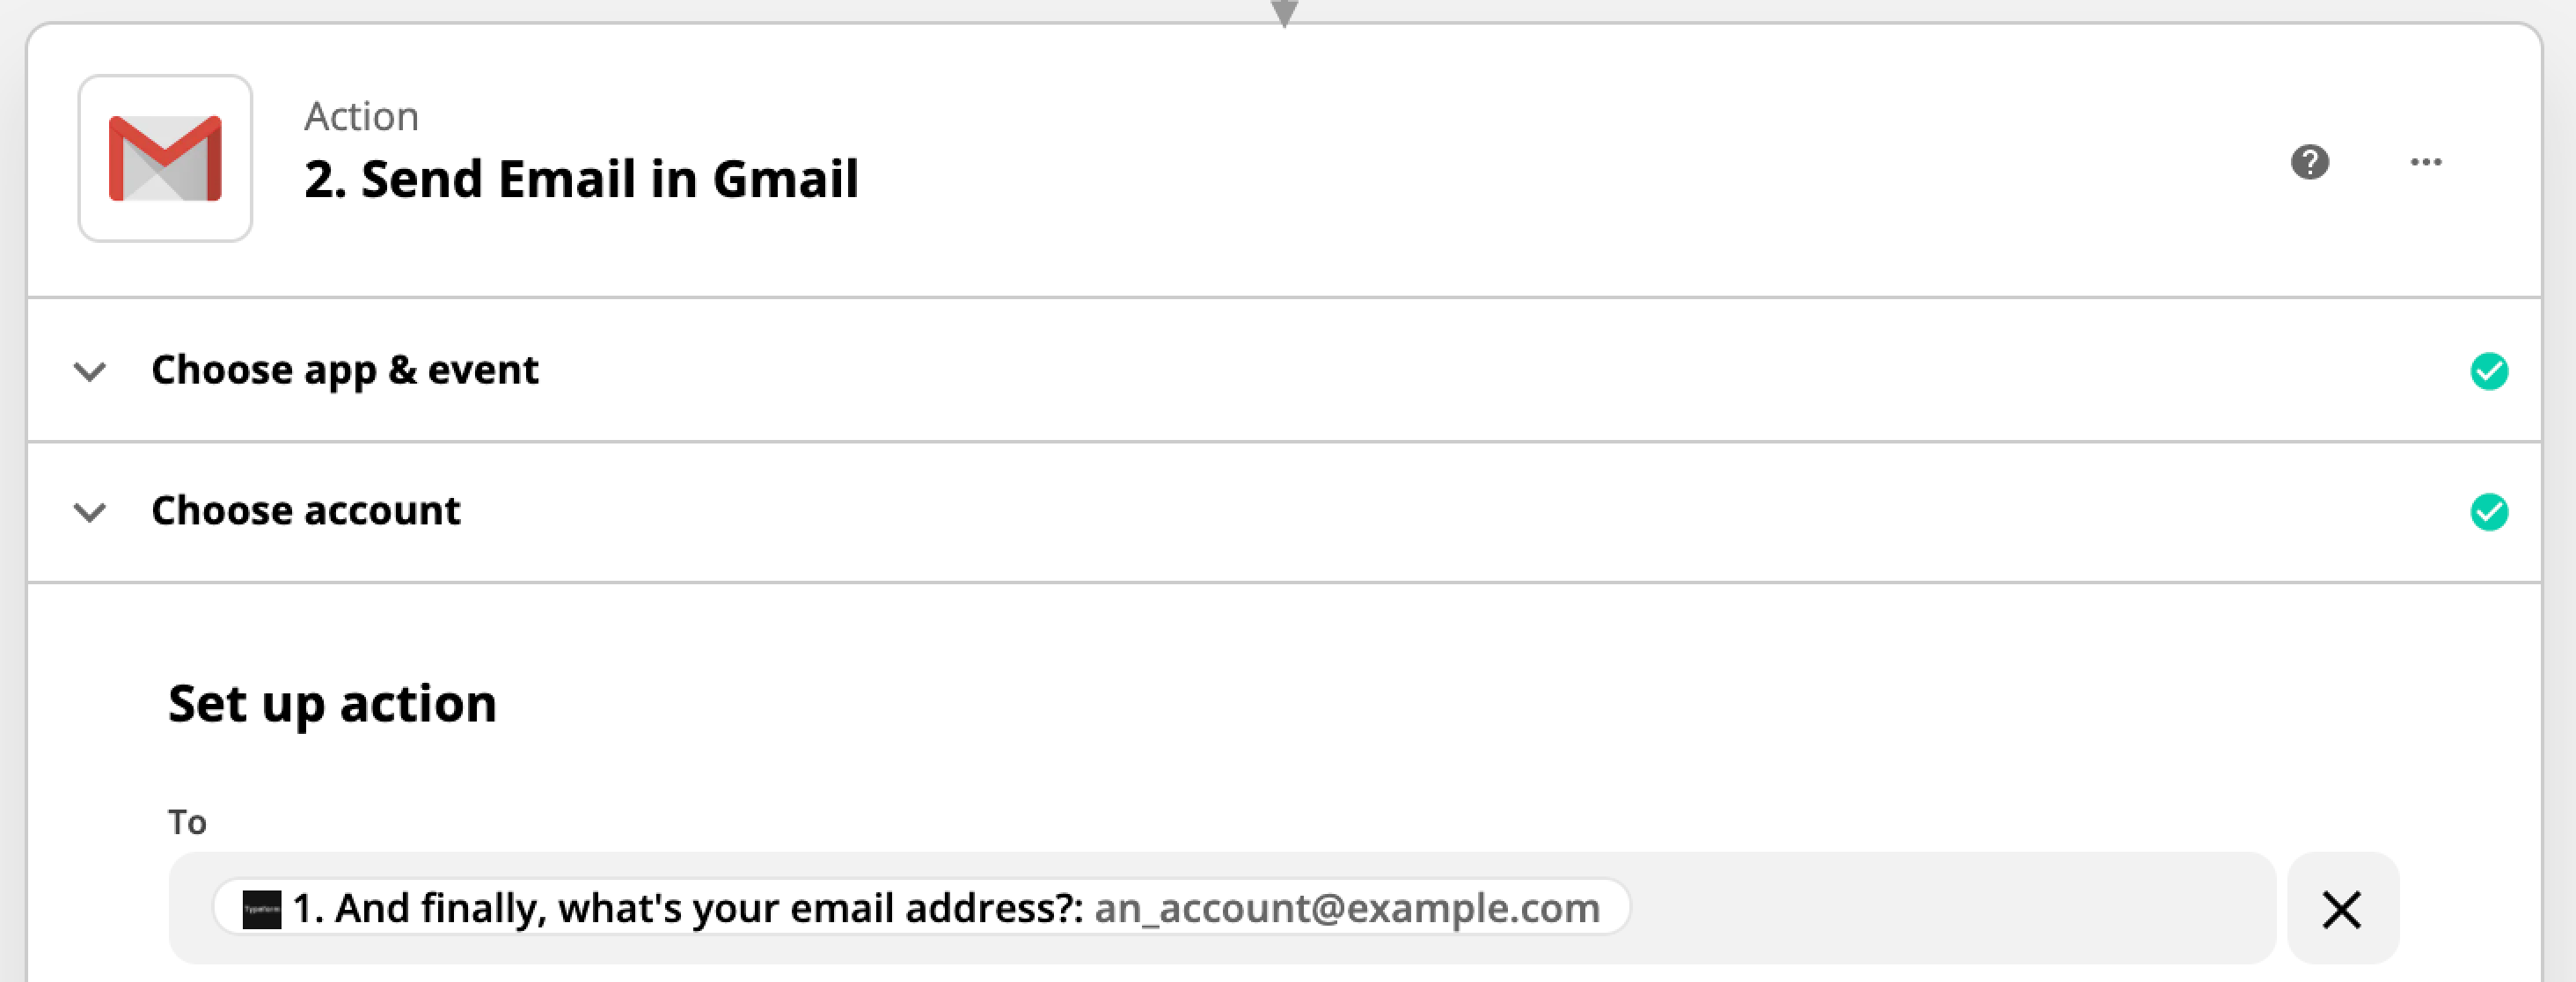
2. Using the selection icon at the end of the “To” field, select the Email question from the typeform. This will ensure that the email notification will be sent to the email address given by the respondent:
3. Configure the email body with the content for case #1: when the answer "Art Direction" is selected.
4. Once you’re done configuring the email, click on the + icon between the Trigger (New Entry) and the Action (Send Email):
5. Choose the Filter block from the menu that appears.
6. Set up the filter by adding conditions and click on Continue. Using our example, we want the above configured email sent only if the answer to the question “How can we help you?” is "Art Direction". Therefore, we used the condition: (Text) Exactly matches “Art Direction” as seen in this screenshot:
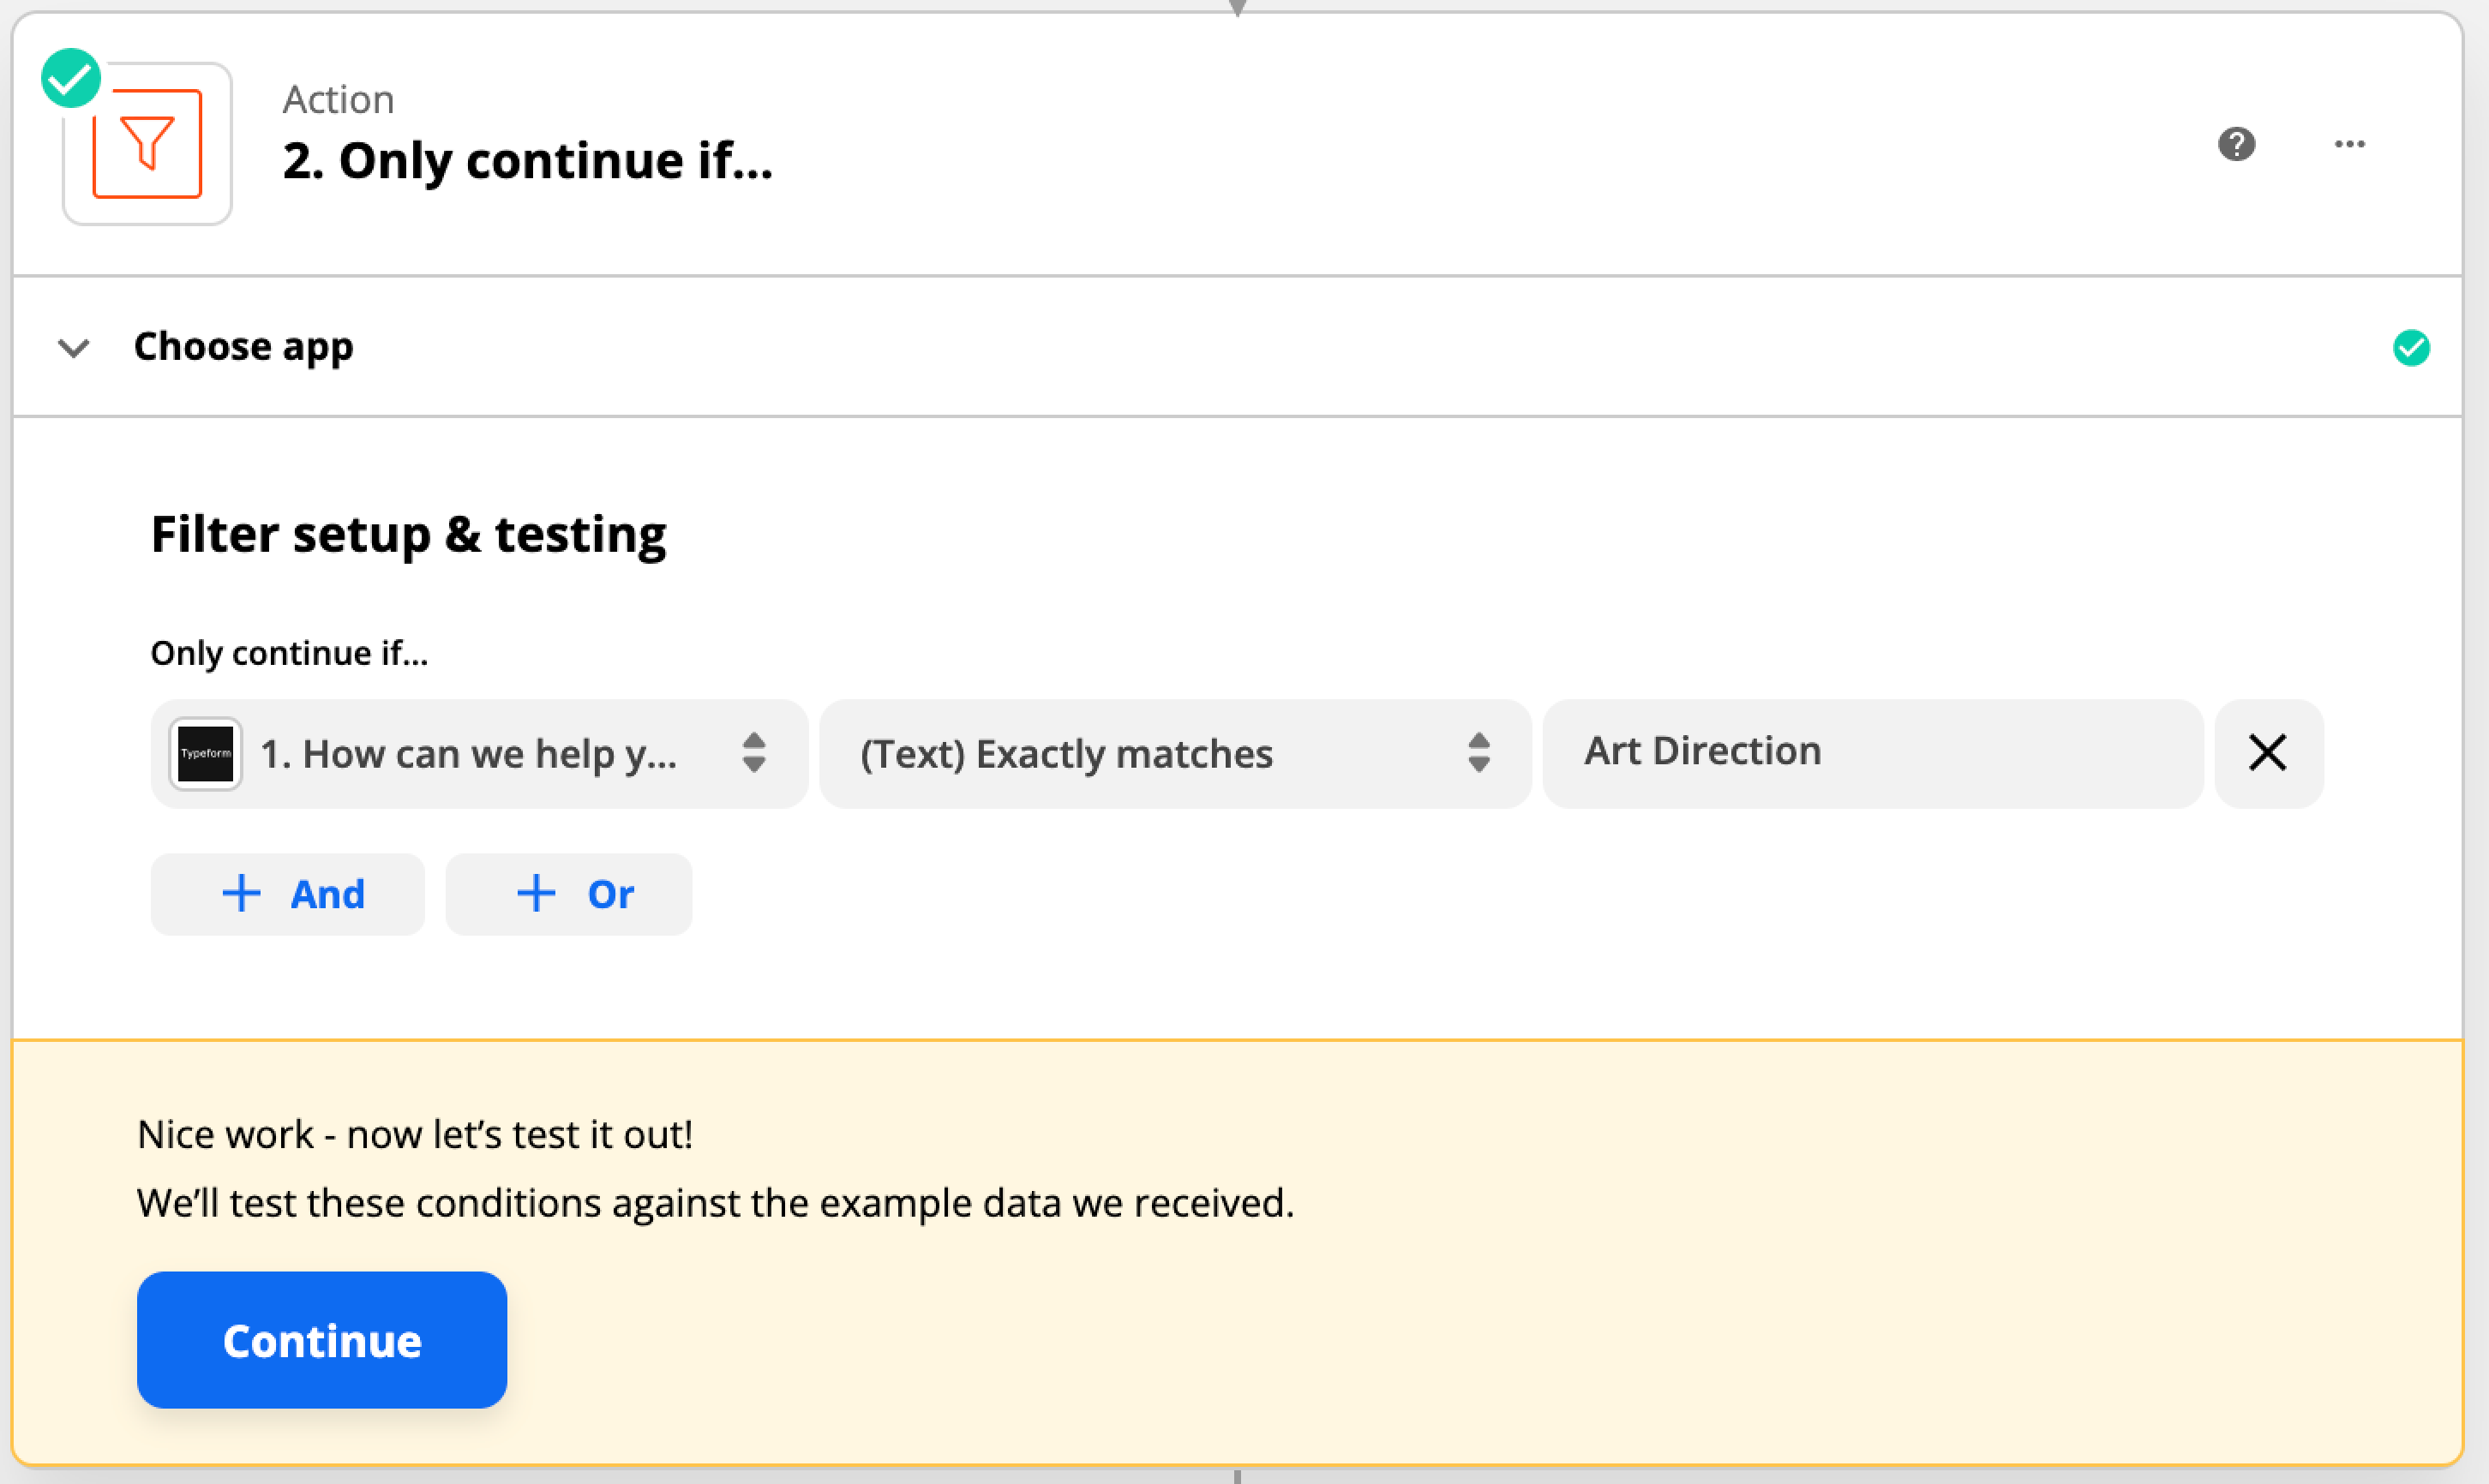
This will ensure that the Zap will only run if the condition is met.
7. Finally, make sure you turn the Zap on!
Please note, that you’ll have to set up Zaps to cover each scenario. Using our example, we need to set up four Zaps:
Send email with relevant content if the answer to Question 1 is "Art Direction": as described above.
1. Send email with relevant content if the answer to Question 1 is "Website Production": follow the steps described above but…
- Configure the Subject line and Body of the email accordingly under Step 2
- Select “Website Production” when setting up the filter under Step 6
2. Send email with relevant content if the answer to Question 1 is "App Development": follow the steps described above but…
- Configure the Subject line and Body of the email accordingly under Step 2
- Select “App Development” when setting up the filter under Step 6
3. Send email with relevant content if the answer to Question 1 is "Video Creation": follow the steps described above but…
- Configure the Subject line and Body of the email accordingly under Step 2
- Select “Website Production” when setting up the filter under Step 6
And that’s it!
To learn how to set up notifications based on score, check out this article.